
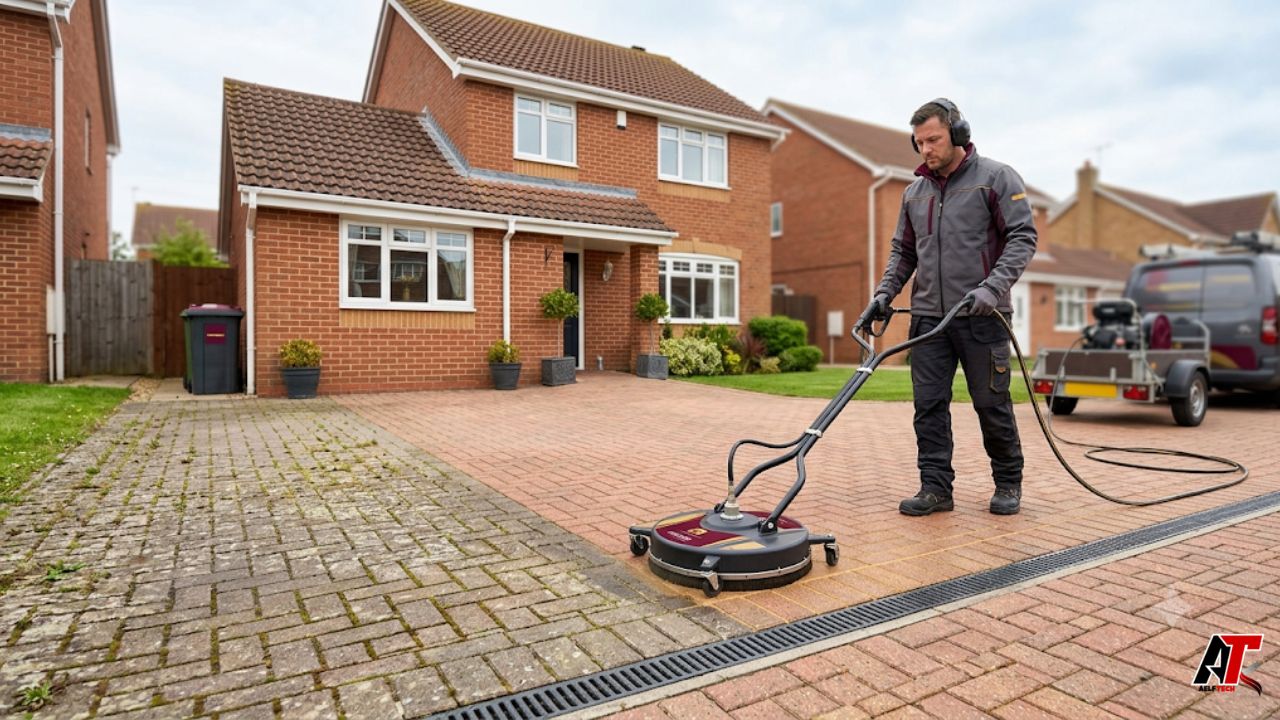
A driveway works hard every day. It carries vehicles, catches oil drips, collects soil from tyres and faces months of rain, frost, shade and airborne dirt. Over time, the surface may become dull, stained, slippery or uneven. Weeds can appear in joints, moss may spread across shaded areas and old paving can lose the crisp finish it had when first installed. The good news is that many tired driveways do not need replacing. With the right assessment, cleaning method and restoration work, you can often recover their appearance and extend their useful life.
This complete guide explains driveway cleaning and restoration for UK homeowners in practical terms. It covers common driveway materials, safe pressure washing, stain treatment, block-paving re-sanding, sealing, small repairs and long-term maintenance. It also helps you decide which tasks are suitable for DIY work and when a professional contractor is the safer and more cost-effective choice.
Why UK Driveways Need Regular Care
The British climate creates ideal conditions for organic growth. Frequent rain, mild temperatures and limited winter sunlight allow algae, moss and lichens to develop, particularly on north-facing or shaded areas. The Royal Horticultural Society notes that these growths commonly appear on drives and paths and can make hard surfaces slippery. Leaves and wind-blown soil add nutrients, while standing water keeps the surface damp for longer.
Regular care is not only about kerb appeal. Dirt can conceal cracks, failed pointing, loose blocks and drainage problems. Missing jointing sand may allow block paving to move, while water entering damaged areas can worsen defects during freeze-thaw cycles. A sensible maintenance routine makes hazards easier to spot and can prevent a small repair from becoming a larger restoration project.
Start with a Detailed Driveway Inspection
Before using a pressure washer or cleaning chemical, inspect the entire driveway when it is dry. Look for loose or rocking blocks, sunken wheel tracks, cracked concrete, crumbling edges, open joints, flaking stone and areas where water gathers after rain. Check channel drains and gullies for leaves, silt or blockages. Photograph existing damage so you can distinguish old defects from anything revealed during cleaning.
Also identify the stains you are dealing with. Green film usually indicates algae, while thicker growth may be moss. Dark spots can be oil, tyre marks or deeply embedded dirt. Orange-brown marks may be rust, and pale deposits on block paving can be efflorescence. Each problem needs a different response; blasting every mark with maximum pressure can damage the surface without removing the stain.
Know Your Driveway Surface
Block paving is made from individual concrete or clay units, usually laid on sand with kiln-dried sand in the joints. It can respond well to careful pressure washing, but the cleaning process often removes jointing sand, which must be replaced after the paving dries. Natural stone requires more caution because sandstone and other layered stones may flake under an aggressive jet. Always test a discreet area first.
Concrete is generally robust, although old, weak or decorative concrete can etch if the nozzle is held too close. Tarmac and asphalt should be cleaned with lower pressure because a concentrated jet may loosen aggregate or leave visible lines. Resin-bound driveways should be treated according to the installer or manufacturer’s instructions, using gentle cleaning and avoiding harsh solvents. Gravel is not pressure washed; it is raked, weeded, topped up and corrected where migration or rutting has occurred.
The Step-by-Step Driveway Cleaning Process
Begin by removing vehicles, pots, bins and lightweight furniture. Sweep thoroughly so loose grit does not become high-speed debris. Pull large weeds by hand and clear drainage channels. Protect nearby doors, painted walls, electrical fittings, ponds and delicate planting. If a cleaner is required, select a product specifically suitable for the driveway material and follow the label for dilution, dwell time, protective equipment and rinsing.
Work from the highest point towards the drainage direction. Pre-wet surrounding plants, then apply the chosen cleaner only where needed. Clean in controlled, overlapping passes rather than random strokes. A rotary surface-cleaner attachment can create a more even finish on suitable paving and reduce striping. Rinse carefully, collect debris and avoid pushing silt into drains. Allow the driveway to dry before assessing the final result, because wet paving often appears darker and can hide remaining stains.
How to Pressure Wash Without Causing Damage
Pressure washing is effective, but pressure alone is not a measure of quality. The safest setting depends on surface strength, nozzle type, distance and the angle of the lance. Begin with lower pressure on a small test patch. Keep the nozzle moving and avoid holding a narrow jet in one place. On block paving, aim across the surface at a shallow angle rather than directly into joints, where the water can remove sand and disturb the bedding below.
Wear eye protection, sturdy footwear and clothing that covers exposed skin. Keep children and pets away, and never direct the jet towards people, cables, windows or vehicles. Do not pressure wash visibly loose paving until it has been stabilised. Pavingexpert warns that power washing can damage vulnerable surfaces and advises testing an inconspicuous area when suitability is uncertain. If the driveway contains fragile stone, failed pointing or extensive movement, professional assessment should come before cleaning.
Treating Oil, Rust, Tyre Marks and Organic Growth
Fresh oil should be absorbed quickly with a suitable absorbent material, then treated with a driveway-safe degreaser. Older oil can penetrate deeply and may improve rather than disappear completely. Tyre marks often respond to detergent and agitation with a stiff nylon brush. Rust and cement stains may require specialist products, but acids can discolour concrete, damage stone or attack metal fixtures, so spot testing and exact label compliance are essential.
Moss and algae can often be loosened by brushing and careful washing. The RHS recommends simple physical controls such as regular brushing, improving airflow, reducing shade where practical, keeping drains clear and correcting standing-water problems. Chemical treatment should not substitute for fixing damp conditions. Never mix cleaning products, especially chlorine-based products with acids or ammonia, because dangerous gases can be produced.
Restoring Block Paving After Cleaning
Once block paving is completely dry, inspect the joints. Pressure washing usually removes some of the original kiln-dried sand, and leaving joints empty reduces interlock between the blocks. Sweep clean, dry kiln-dried jointing sand diagonally across the paving so it falls into the gaps. Continue until the joints are full, then remove loose material from the surface. Follow the sand manufacturer’s instructions and check whether mechanical compaction is appropriate for the driveway condition.
Re-sanding does not repair a failed base. Sunken areas, rocking blocks or spreading edges should be lifted and rebuilt after the cause is identified. Paving maintenance guidance emphasises that movement can result from poor compaction, water entering the bedding, lost jointing material, failed edge restraints or loads beyond the original design. Simply adding sand or mortar over a structural problem may hide it briefly but will not provide a lasting repair.
Concrete, Tarmac and Natural-Stone Restoration
Concrete restoration may involve filling suitable cracks, repairing broken edges or applying a compatible resurfacing system after thorough preparation. The repair material must match the defect and allow for expected movement; cosmetic coatings should never be used to disguise active structural cracking. Pattern-imprinted concrete may require specialist resealing, including correct preparation and attention to slip resistance.
Tarmac restoration begins with gentle cleaning, weed removal and repair of potholes, open joints or broken edges. A compatible rejuvenating coating can improve colour and surface protection, but it will not correct a weak or deformed base. Natural stone may need careful stain treatment, repointing and replacement of delaminated or cracked slabs. Because stone varies widely in porosity and mineral content, test all products and avoid assuming that a cleaner or sealer suitable for concrete is safe for stone.
Should You Seal a Driveway?
Sealing can reduce staining, stabilise jointing sand and change the appearance of some surfaces. However, it is not an automatic final step for every driveway. The sealer must be designed for the exact paving material, existing coatings must be considered and the surface must be clean and adequately dry. Applying sealer over trapped moisture, efflorescence, residual dirt or poorly filled joints can create whitening, patchiness or adhesion failure.
Choose the finish carefully. Colour-enhancing and wet-look products can deepen tones, while penetrating sealers may produce less visible change. Consider breathability, slip resistance, UV stability and future maintenance. Pavingexpert advises that sealant suitability varies by paving type and stresses the importance of correct preparation and dry conditions. A small test area is sensible, particularly on natural stone or older paving where the final colour may be difficult to predict.
Drainage and Environmental Responsibility
Cleaning water can contain soil, oil, detergents, biocides and fine sediment. Surface-water drains may discharge directly into rivers or the wider environment, so polluted runoff should not simply be washed into the nearest gully. GOV.UK guidance for businesses states that contaminated water must be kept out of surface-water drains and directed through an appropriate collection, treatment or disposal route. Homeowners should use the same precautionary principle and check local rules when chemicals or significant contamination are involved.
Before work begins, identify where water will flow. Block nearby surface drains when necessary, recover slurry and prevent runoff entering neighbouring property, ponds or planting beds. Use the minimum amount of product and water needed. Keeping channels clear, correcting low spots and maintaining a slight fall away from buildings will also help the driveway dry faster and make recurring algae less likely.
A Practical Maintenance Schedule
In spring, sweep the driveway, clear drains and inspect winter damage. Treat small areas of algae before they spread, and replenish missing joint sand during a dry period. Through summer, remove oil spots promptly and keep weeds from establishing. Autumn maintenance should focus on frequent leaf removal, because wet leaves stain paving, hold moisture and create a slip risk. Before winter, check cracks, drainage and loose edges so water cannot settle and freeze in vulnerable areas.
A deep clean is usually needed only when condition and appearance justify it. Excessive high-pressure washing can erode joints and wear vulnerable surfaces. Between major cleans, regular sweeping and targeted stain removal are often enough. For more straightforward home-maintenance guidance and planning ideas, readers can explore aelftech.com and build a routine suited to their property rather than relying on emergency cleaning after years of neglect.
DIY or Professional Driveway Restoration?
DIY cleaning may suit a small, sound driveway with light dirt, straightforward drainage and a homeowner who understands the equipment. Professional help becomes more valuable when the surface is large, heavily stained, fragile, uneven, previously sealed or close to sensitive drainage. Restoration work involving lifting blocks, repairing tarmac, repointing stone or applying specialist coatings also demands greater product knowledge and preparation.
When comparing contractors, ask for a written scope covering surface assessment, cleaning method, chemical use, runoff control, re-sanding, repairs, sealing and curing time. Confirm insurance and request recent examples on the same surface type. For homeowners seeking Suffolk driveway cleaning, Stronghold Cleaning Services describes driveway restoration options that include pressure washing, replacement jointing sand and optional sealing for suitable surfaces. A detailed quotation helps you compare like with like rather than choosing solely by the lowest headline price.
Conclusion
Driveway cleaning and restoration is most successful when it is treated as maintenance rather than a cosmetic blast with a pressure washer. Start with inspection, identify the paving material, choose the least aggressive effective method and protect joints, drainage and nearby planting. After cleaning, complete the restoration properly with re-sanding, repairs or a suitable sealer only where these steps are genuinely needed.
For UK homeowners, a well-maintained driveway improves the entrance to the property, reduces slip risks and makes defects easier to manage before they worsen. Whether you complete light maintenance yourself or employ a specialist, a clear plan and material-specific approach will deliver a cleaner, safer and longer-lasting result.
Leave a Reply