
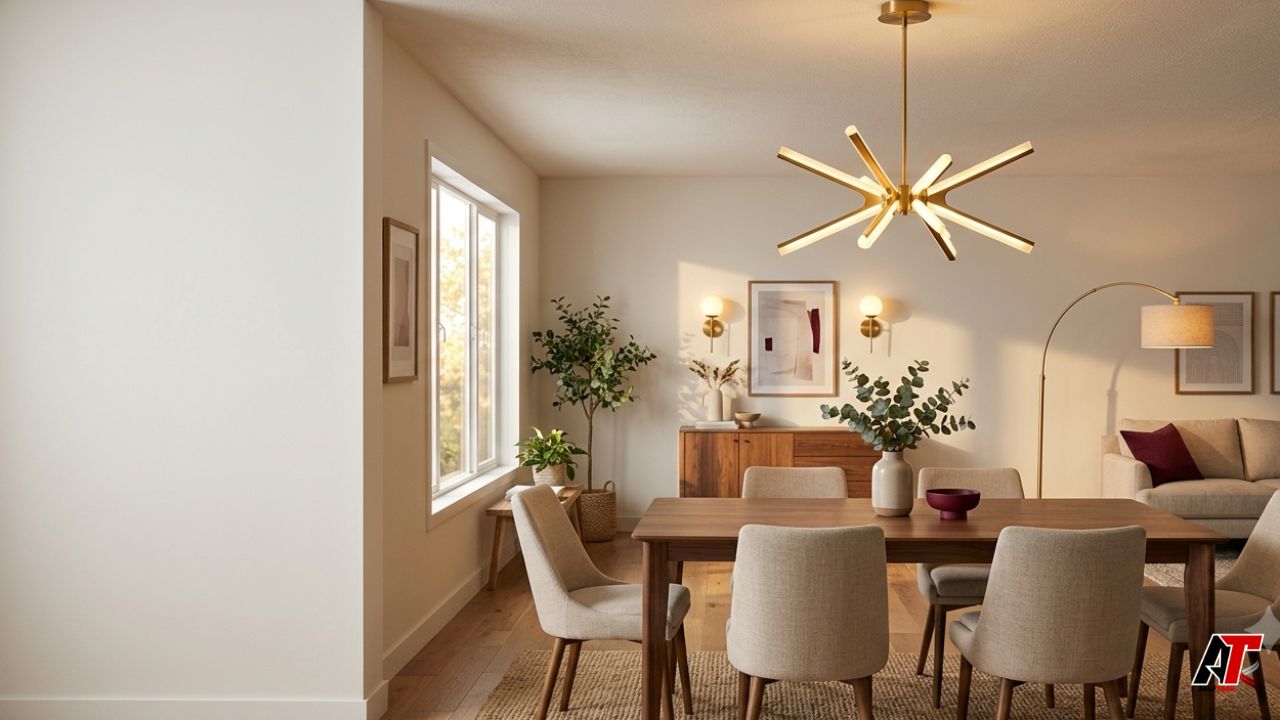
A ceiling light is easy to notice when it is wrong. It may glare across a television, make food look dull, crowd a low ceiling, or leave corners in shadow. When it is right, however, it quietly improves the whole room. The furniture appears more intentional, colors feel richer, and daily tasks become easier. That is why learning how to choose ceiling lights is not simply a decorating exercise. It is a long-term decision about comfort, function, energy use, and the way your home feels after sunset.
The most successful fixture is rarely the trendiest one in a showroom. It is the light that fits the room’s proportions, supplies the right amount and quality of illumination, works with the ceiling height, and remains practical to clean or repair. This guide breaks the process into clear decisions so you can select lighting that looks considered today and still serves you well years from now.
Start With the Work the Light Must Do
Before comparing finishes or shapes, decide what the room needs from its overhead light. Most spaces use three lighting layers. Ambient lighting supplies general visibility. Task lighting supports focused activities such as cooking, reading, grooming, or working. Accent lighting highlights art, architecture, shelves, or textured walls. A ceiling fixture usually carries much of the ambient layer, but it should not be expected to perform every job by itself.
A living room may need a gentle central glow supported by floor lamps and wall lights. A kitchen usually needs stronger general illumination plus focused light over counters and an island. A bedroom benefits from warm, dimmable light, while a laundry room needs clear, even brightness. Write down the activities in each room before shopping. This small step prevents you from choosing a beautiful fixture that cannot support real life.
Match the Fixture Type to the Ceiling Height
Ceiling height immediately narrows your options. Flush-mount fixtures sit close to the ceiling and work well in hallways, bedrooms, closets, entries, and rooms with lower ceilings. Semi-flush fixtures hang slightly below the canopy, adding depth and visual interest without taking up as much vertical space as a chandelier or pendant. They are often a useful middle ground for standard-height rooms.
Pendant lights and chandeliers create stronger visual impact, but they require adequate clearance. Over a dining table or kitchen island, a lower fixture can define the zone because people do not walk beneath it. In an open passage, the bottom of the fixture must remain comfortably above head level. Vaulted and double-height ceilings may need larger fixtures, longer suspensions, or grouped lights so the design does not look undersized in the volume of the room.
Always measure the finished ceiling height, not the height shown on a building plan. Include the fixture body, chain, stem, canopy, and any decorative drop. If you are uncertain, make a simple cardboard outline and suspend it temporarily. Seeing the proposed scale in the actual room is more reliable than judging it from a product image.
Choose a Size That Belongs in the Room
Scale affects both style and performance. A small fixture can appear lost in a large room, while an oversized design may feel heavy or obstruct views. Room dimensions offer a starting point, but they are not the only consideration. Furniture layout, ceiling architecture, sightlines, and the visual weight of the fixture all matter. A delicate open-frame chandelier can be physically wide yet feel lighter than a compact opaque drum.
For dining rooms, relate the fixture to the table rather than the entire room. It should feel centered and substantial without extending so far that people bump it or lose sight of one another. Over a kitchen island, decide whether one long linear fixture or a series of pendants will create better balance. In a bedroom, confirm that open doors, wardrobes, and ceiling fans will not conflict with the light. Use measurements from the product specification sheet and mark the footprint with painter’s tape before ordering.
Shop by Lumens, Not by Wattage Alone
Brightness is measured in lumens. Wattage describes energy use, so two modern light sources can consume different amounts of power while producing similar brightness. The U.S. Department of Energy and the Federal Trade Commission advise consumers to compare lumens when judging light output. This is especially important with integrated LED fixtures, where a low wattage can still produce substantial illumination.
The right lumen level depends on room size, surface colors, natural light, fixture design, and the tasks performed. Dark walls and high ceilings may require more output than pale, reflective surfaces. An opaque shade also delivers light differently from clear glass or an open frame. Instead of relying on one universal number, check the fixture’s total lumen output, beam direction, and distribution. For a large room, several light sources often produce a more comfortable result than one extremely bright central point.
Dimming gives you flexibility as daylight and activities change. Confirm that the fixture is dimmable and that the dimmer is compatible with the LED driver or bulbs. Poor compatibility can cause flicker, buzzing, limited dimming range, or failure to switch off cleanly.
Select a Color Temperature That Supports the Room
Color temperature is expressed in kelvin and describes whether white light appears warmer or cooler. Lower values have a softer yellow-to-amber character; higher values appear cleaner and bluer. The Department of Energy notes that roughly 2700K to 3600K is commonly suitable for indoor general and task lighting, although the best choice depends on the room and personal preference.
Warm light around 2700K to 3000K usually suits bedrooms, living rooms, and dining spaces because it complements wood, textiles, and relaxed evening use. Neutral light around 3000K to 3500K can work well in kitchens, bathrooms, closets, and contemporary interiors. Cooler light may be useful in work-oriented spaces, but it can feel clinical when used throughout a home. Keep adjacent rooms reasonably consistent so the color of the light does not shift abruptly as you move through open spaces.
Tunable-white fixtures offer more control, but technology should solve a real need. A dependable fixed color temperature with smooth dimming may age better than a complex connected system you rarely use.
Pay Attention to Color Rendering
Brightness does not tell you how accurately a light reveals color. Color Rendering Index, or CRI, is one commonly used measure. ENERGY STAR explains that CRI represents the degree of color shift objects experience under a light source compared with a reference source of similar color temperature. A higher-quality light can make skin tones, food, artwork, flooring, and fabrics appear more natural.
For everyday residential use, look beyond the lowest acceptable specification when the room contains important finishes or detailed tasks. Kitchens, dressing areas, bathrooms, studios, and dining rooms particularly benefit from good color rendering. Also consider consistency. Two fixtures with the same labeled color temperature can still look different, so use matching lamps or products from the same family where visual continuity matters.
Build a Layered Lighting Plan
A ceiling fixture should lead a lighting scheme, not dominate it. One bright overhead light often creates hard shadows and a flat atmosphere. Layering spreads illumination across different heights and directions. Add under-cabinet lighting in kitchens, reading lamps beside seating, sconces near mirrors, and accent lights around artwork or shelving. Each layer can then operate at a comfortable level.
Plan switches at the same time as fixtures. Separate circuits let you adjust zones independently, while dimmers help one room transition from cleaning to entertaining. In open-plan spaces, repeat a material, finish, or geometric idea across fixtures without making every piece identical. This creates a connected home rather than a showroom set.
Choose Materials and Finishes for Longevity
Metal thickness, joinery, glass clarity, canopy fit, wiring access, and the stability of moving parts all influence how the light ages. Very thin finishes may scratch or discolor, while poorly supported arms can shift out of alignment. Read specifications closely and examine detailed photographs rather than buying from a single styled image.
Timeless does not have to mean plain. Simple silhouettes, balanced proportions, and finishes that relate to permanent elements—such as door hardware, faucets, or window frames—usually adapt more easily than highly specific novelty designs. Browse well-organized collections of ceiling lights to compare flush mounts, semi-flush fixtures, pendants, and statement designs by shape and application.
Mixed metals can work when the combination appears deliberate. Repeat each finish at least once elsewhere in the room, and avoid forcing an exact match between products whose undertones visibly clash.
Consider Maintenance Before You Fall in Love
A dramatic fixture loses its charm if cleaning it requires scaffolding or dozens of fragile parts. Think about dust, grease, insects, fingerprints, and access to bulbs or LED drivers. Kitchen fixtures need surfaces that can be wiped easily. Textured shades and exposed crystals demand more care. In stairwells or high foyers, maintenance access should influence the design from the beginning.
Decide whether you prefer replaceable bulbs or an integrated LED. Replaceable bulbs are easy to source and allow future changes in brightness or color temperature. Integrated LEDs can produce slim, sculptural forms and efficient light distribution, but the driver and light engine may be harder to replace. Ask whether replacement components are available, how the product is serviced, and what the warranty covers. A long claimed LED life is most useful when the fixture’s electronics and thermal design are also dependable.
Use the Correct Rating for the Location
Bathrooms, covered patios, and other moisture-prone locations require fixtures rated for the conditions. A damp-location rating is not the same as a wet-location rating. The correct choice depends on whether the fixture may encounter humidity, condensation, splashing, or direct water exposure. Product documentation should clearly state the approved location.
Also check the fixture’s weight, mounting requirements, electrical box, ceiling structure, voltage, and local code requirements. Large chandeliers and heavy decorative lights may need additional support. Hire a qualified electrician when installation involves new wiring, structural reinforcement, unfamiliar controls, or any uncertainty. Good design cannot compensate for unsafe mounting or incorrect electrical work.
Coordinate the Light With the Interior, Not Just the Furniture
Furniture changes more frequently than floors, cabinetry, moldings, and architecture. Choose the ceiling light in relation to those durable elements. A streamlined fixture can calm an ornate room, while a sculptural light can add character to a simple space. The goal is contrast with purpose, not visual competition.
Set a Budget Based on Total Ownership
The purchase price is only one cost. Include bulbs, compatible dimmers, electrician fees, ceiling reinforcement, delivery, assembly, replacement parts, and future maintenance. Spending more can be sensible for a central fixture used every day, while a simpler design may be adequate in a utility space. Allocate money according to visibility and function rather than treating every room equally.
Avoid choosing solely by discount percentage. A well-priced fixture is one that delivers suitable light, durable construction, safe installation, and a style you will keep. Replacing an unsuitable light after a year costs more than making a careful decision once.
A Room-by-Room Selection Checklist
For living rooms, prioritize comfortable dimming, good light distribution, and compatibility with lamps or sconces. In dining rooms, focus on table scale, glare control, and flattering color. Kitchens need strong, even ambient light supported by task lighting. Bedrooms benefit from warm color temperature and controls accessible from the entrance and bedside. Bathrooms need appropriate location ratings, accurate color, and reduced facial shadowing. Hallways and closets call for reliable, efficient fixtures with suitable clearance.
Before ordering, record the ceiling height, room dimensions, mounting-box position, required drop, fixture diameter, total lumens, color temperature, CRI, dimming method, location rating, weight, warranty, and cleaning needs. Confirm the return policy before scheduling installation. For additional practical guides on improving how products and services are selected online, visit aelftech.com.
Final Thoughts
The best ceiling light is a meeting point between architecture, illumination, and daily behavior. It should provide enough light without glare, suit the ceiling height, relate to the room’s scale, and remain manageable to clean and maintain. Technical details such as lumens, color temperature, CRI, dimmer compatibility, and location rating are not separate from design; they determine whether the design succeeds. When you understand how to choose ceiling lights, you can move beyond quick visual attraction and make a more durable decision. Measure first, define the room’s tasks, compare specifications, and picture how the fixture will look from multiple angles. A thoughtful choice will not merely brighten the ceiling. It will improve the way your home works and feels for years.
Leave a Reply