
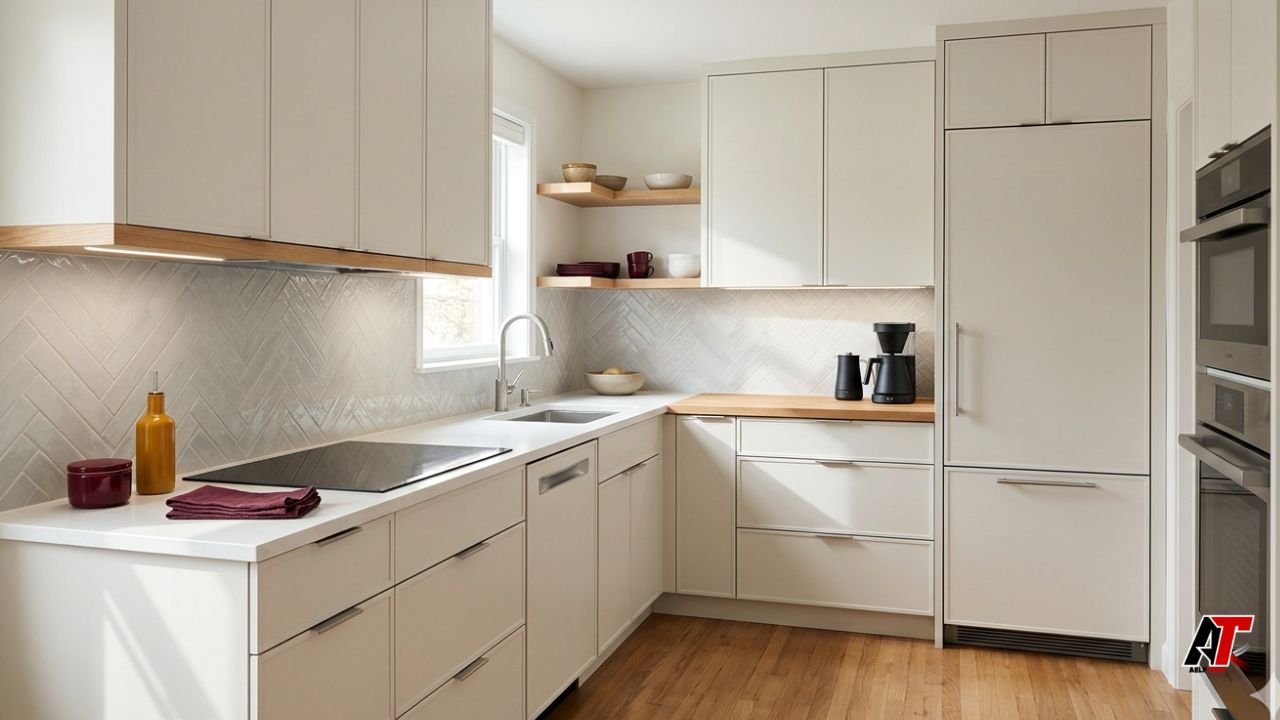
A small kitchen does not need a complicated design to work beautifully. It needs a layout that protects movement, keeps everyday tools within reach, and gives the cook enough clear surface to prepare food without constantly shifting items. That is why the best small kitchen layout is not automatically the trendiest one. It is the arrangement that responds to the room’s shape, doors, windows, plumbing, appliances, storage needs, and the way the household actually cooks.
In many compact kitchens, every inch has more than one job. A short counter may be a prep zone in the evening and a breakfast spot in the morning. A tall cabinet may hold groceries, a microwave, and cleaning supplies. Good planning makes those overlaps feel intentional rather than crowded. The following guide explains how to compare common layouts, organize the main work zones, improve storage, and avoid choices that make a small room harder to use.
Begin With the Room, Not a Favourite Layout
Start by measuring the full room before deciding where cabinets should go. Record the wall lengths, ceiling height, window positions, door swings, radiators, vents, columns, plumbing points, electrical outlets, and any uneven corners. Measure at more than one height because older walls may not be perfectly straight. Then mark the dimensions of every appliance, including handle depth and the extra space needed for doors and drawers to open.
Next, map the natural traffic route. A kitchen that connects a hallway to a garden door has different needs from a closed room used by one person. Try to keep through-traffic outside the main cooking zone. When people must cross between the sink and hob to reach another room, even a visually attractive layout can become frustrating or unsafe. This early assessment also helps you decide whether relocating plumbing or electrical services would improve the plan enough to justify the extra cost.
Which Small Kitchen Layout Works Best?
A one-wall kitchen is often best for a studio or open living area because it preserves floor space. Its weakness is limited worktop, so the sequence matters: refrigerator, landing space, sink, preparation surface, and cooking area should flow logically.
A galley is often the most efficient choice for a long, narrow room. Two parallel runs create storage and keep tasks close together. Appliance doors must not collide, and the layout works best when household traffic moves around rather than through the work area.
An L-shaped kitchen uses two adjoining walls and leaves the centre open, making it flexible for a compact square or open-plan room. A small U-shaped layout provides more worktop and storage, but it can feel enclosed. Shallower storage on one side can preserve circulation.
Use Work Zones Instead of Forcing a Perfect Triangle
The traditional work triangle connects the refrigerator, sink, and cooking surface. It remains a useful starting point, but it should not become a rigid rule. Single-wall and galley kitchens may not form a neat triangle at all. What matters more is that related tasks happen in a sensible sequence and that the cook is not taking unnecessary steps.
Think in zones: food storage, washing, preparation, cooking, serving, and cleaning. Keep knives, chopping boards, mixing bowls, and frequently used seasonings near the main prep surface. Store pans close to the hob and plates near the dishwasher or drying area. Position the bin where it can serve both preparation and cleanup without blocking a doorway. This zone-based method creates a layout that reflects real habits, especially in a room where all major elements are already close together.
Protect Aisle Width and Door Clearance
Clearance is more valuable than an oversized island. As a general design target, a work aisle of about 42 inches can support one cook, while around 48 inches is more comfortable for two cooks when the room allows it. Small existing kitchens may have tighter passages, but every drawer, oven, dishwasher, and refrigerator door should still open without trapping the person using it. Always draw open doors on the floor plan rather than checking appliance widths alone.
Avoid placing two frequently opened appliances directly opposite each other in a narrow galley. A dishwasher opposite a refrigerator may look balanced on paper but create a complete blockage when both doors are open. Corner cabinets also need careful attention; handles, pull-outs, and adjacent drawers can collide. Before ordering cabinetry, test the plan at full scale with masking tape on the floor and cardboard outlines for islands or peninsulas.
Prioritise One Useful Stretch of Worktop
A small kitchen benefits more from one uninterrupted preparation area than several tiny pieces of countertop divided by tall units and appliances. Ideally, reserve a clear stretch between the sink and hob because washed ingredients naturally move from cleaning to preparation and then cooking. If that is impossible, create a dedicated prep zone beside the sink and keep it free from permanent countertop appliances.
You can recover space with an over-sink board, a pull-out work surface, a slim rolling cart, or a cover designed for an unused hob. These solutions should be stable and easy to store. Do not reduce the everyday landing space beside hot appliances simply to add decorative storage. A place to set down a hot tray, grocery bag, or kettle is a functional requirement, not wasted space.
Take Storage Upward, but Keep It Easy to Use
Floor-to-ceiling cabinetry uses vertical space efficiently and reduces the dust-catching gap above standard wall units. Store daily items between waist and eye level, heavier cookware in lower drawers, and seasonal equipment on the highest shelves. Deep drawers are often more practical than base cabinets because the full contents come into view without kneeling and searching behind other items.
Use narrow gaps deliberately. A slim pull-out can hold spices, oils, trays, or cleaning products, while toe-kick drawers may accommodate flat baking sheets or linens. Internal organisers matter just as much as cabinet quantity. Dividers, pull-down shelves, corner pull-outs, and door-mounted racks prevent a small cabinet from becoming a deep pile of inaccessible objects. For more visual inspiration, the linked guide to Small Kitchen Interior Design Ideas can help readers compare storage, colour, and layout approaches before committing to a remodel.
Choose Appliances That Support the Layout
The largest appliance is not always the most useful appliance. A counter-depth refrigerator can reduce visual bulk and preserve the aisle. A slim dishwasher may be sufficient for a small household, and an induction hob can provide a flatter, easier-to-clean surface. Combination ovens or microwave-oven units can reduce the number of separate appliances, although capacity and cooking habits should guide the decision.
Check ventilation, service access, manufacturer clearances, and electrical requirements before buying anything. Integrated appliances create a calmer visual line, but they may cost more and require precise cabinetry. Freestanding models are easier to replace. Whichever route you choose, avoid surrounding a heat-producing appliance with inadequate ventilation or positioning handles where they interrupt the main walkway.
Make the Kitchen Feel Larger With Light and Continuity
A compact kitchen needs layered lighting. General ceiling lighting provides overall visibility, under-cabinet lighting removes shadows from the worktop, and a small pendant or wall light can add warmth without taking up surface area. Natural light should remain unobstructed, so avoid placing bulky cabinets where they crowd a window unless the storage gain is essential.
Visual continuity also makes the room feel calmer. Repeating a limited palette across cabinets, walls, counters, and flooring reduces the number of hard visual breaks. Light colours can brighten the room, but darker cabinets can also work when balanced with good illumination and simple lines. Handleless fronts, consistent hardware, and fewer countertop objects help the eye travel through the space without interruption.
Use the Backsplash as a Practical Design Tool
The backsplash protects the wall, but in a small room it can also distribute light and create a sense of depth. Glossy glass, ceramic, and some porcelain surfaces are easy to wipe and can reflect light, while matte or textured finishes introduce warmth and hide marks differently. A full-height treatment can create a cleaner visual field than several unrelated materials meeting in a small area.
When comparing kitchen backsplash tiles, consider cabinet colour, countertop pattern, grout tone, cleaning needs, and the amount of natural light. Order samples and view them in the room at different times of day. A bold pattern can become an effective focal point, but it works best when surrounding finishes are restrained. Continuing one tile pattern across the main wall can also make a short run appear longer.
Do Not Ignore Ventilation, Power, and Safety
Good ventilation is especially important in a small kitchen because cooking moisture, odours, heat, and airborne particles concentrate quickly. A range hood or exhaust fan that vents outdoors is generally more effective than a recirculating unit. The hood should be appropriately sized and installed according to the appliance manufacturer’s instructions. Use it while cooking rather than waiting until smoke or condensation is already visible.
Plan enough conveniently placed outlets so extension leads do not cross wet or hot areas. Keep the cooking surface away from easily opened doors and combustible window treatments. Provide task lighting over knives and hot pans, include a reachable fire extinguisher suitable for kitchen use, and confirm local building, electrical, plumbing, and ventilation rules before construction. A designer or qualified contractor can also identify constraints that are easy to miss in a simple online floor-planning tool.
Common Small-Kitchen Layout Mistakes
One common mistake is forcing in an island because it appears in inspiration photos. If the island narrows circulation or prevents appliances from opening, a slim peninsula, movable cart, or clear floor may be far more useful. Another mistake is filling every wall with upper cabinets. Storage is important, but a room can feel oppressive when cabinetry surrounds the user at eye level. Mixing some closed storage with a carefully placed shelf or open wall may create better balance.
Homeowners also underestimate countertop clutter. Designing no home for the toaster, coffee machine, oils, mail, and charging devices guarantees that the prep zone will disappear. Finally, do not place aesthetics ahead of sequence. A centred hob or symmetrical bank of cabinets may look perfect in an elevation drawing while forcing the refrigerator or bin into an inconvenient position. Daily movement should decide the plan before decorative symmetry.
A Simple Planning Process
First, list the tasks that happen in the kitchen and identify who performs them. Second, measure the room and all fixed elements. Third, sketch two or three layouts rather than committing to the first idea. Fourth, add exact appliance dimensions and draw every door and drawer open. Fifth, mark the storage, washing, preparation, cooking, and serving zones. Sixth, test the clearances at full scale and revise any collision points.
After the layout works, choose cabinets, worktops, lighting, backsplash, colours, and hardware. Obtain detailed quotations that separate cabinetry, installation, plumbing, electrical work, ventilation, tiling, and decoration. Keep a contingency for hidden issues, especially in older homes. Resources published by aelftech.com can also support broader planning and technology decisions when homeowners are researching upgrades, smart appliances, or digital tools for managing a renovation.
Final Verdict: What Is the Best Layout?
For a very narrow room, a carefully planned galley is often the most efficient layout. For an open or square room, an L shape usually provides the best balance of workflow and circulation. A one-wall layout protects floor space in a studio, while a compact U shape suits someone who needs maximum storage and worktop. The label matters less than the execution.
The best small kitchen layout keeps movement simple, preserves a genuine prep surface, gives every essential item a logical home, and prevents doors from fighting for the same space. Build the plan around habits first and finishes second. When those priorities are right, a small kitchen can feel organised, comfortable, and surprisingly generous every day.
Small-Kitchen Layout Comparison
| Layout | Best For | Main Strength | Watch Out For |
| One-wall | Studios and open rooms | Preserves floor area | Limited worktop and storage |
| Galley | Long, narrow rooms | Efficient workflow | Door collisions and through-traffic |
| L-shaped | Square or open-plan rooms | Flexible circulation | Corner storage can be awkward |
| Compact U-shaped | Storage-heavy households | Maximum counters and cabinets | Can feel enclosed if too tight |
Leave a Reply