
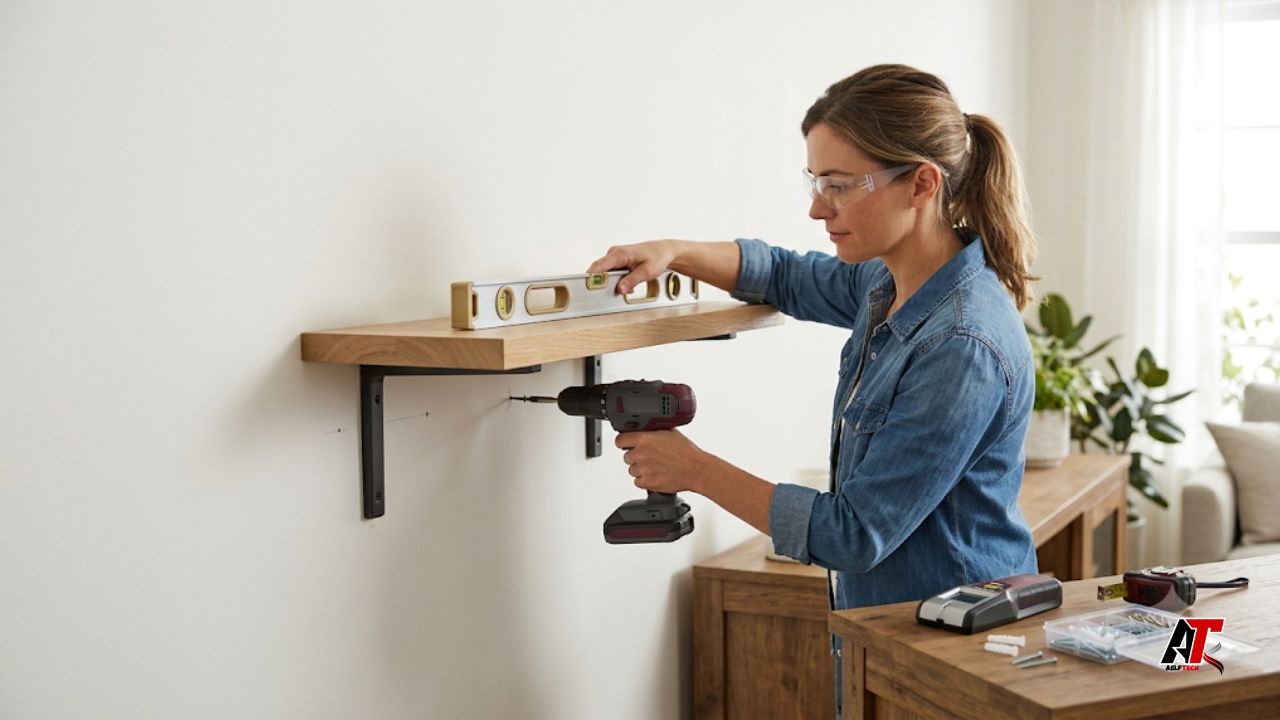
Installing shelves may look simple, but safe results depend on planning. To install wall-mounted shelves safely, you must understand the wall, choose suitable hardware, avoid hidden pipes and cables, measure carefully, and respect the load limit. Rushing can cause crooked shelves, damaged surfaces, or fixings that fail after loading. A careful process creates storage that looks neat and remains secure.
The same basic safety principles apply whether you are fitting a small display ledge, kitchen storage, floating shelves, or larger wall-mounted shelves. The details change according to the surface and expected load. This guide explains the full process in clear steps so that you can plan the job, use the right fixings, and know when professional help is the safer choice.
Start by Deciding What the Shelf Must Hold
Before buying brackets or anchors, decide exactly how the shelf will be used. A shelf for framed photos needs much less support than one holding hardback books, cookware, tools, speakers, or several plants. Estimate the total load, including the weight of the shelf board itself. Then leave a safety margin instead of selecting hardware that only just meets your estimate.
The shelf depth also matters. A deeper shelf creates more leverage against the wall, especially when heavy items are placed near the front edge. Long shelves may need an extra center bracket to prevent sagging. For book storage, purpose-built wall bookshelves can also help you compare proportions, support styles, and layouts before you begin your own project.
- List the items you plan to store and estimate their combined weight.
- Check the manufacturer’s maximum load rating for the shelf, brackets, and anchors.
- Plan for future use; shelves often become heavier over time.
- Keep especially heavy, fragile, or valuable items away from weak partitions and high-traffic areas.
Identify the Wall Type Before Drilling
The correct fixing depends on what is behind the surface. Drywall, plaster, timber studs, brick, concrete, hollow block, and tile all behave differently. Tapping may offer a clue, but it is not reliable for a heavy installation. Use a stud finder, available building information, or a small test hole in a safe hidden position.
For drywall, fastening into timber or metal studs usually provides the strongest support. Where no stud is available, use an anchor specifically rated for the wall thickness and expected load. Masonry walls normally require a masonry drill bit and suitable plugs or masonry screws. Old plaster can be brittle, so drilling slowly and avoiding excessive pressure helps reduce cracking.
Choose the Shelf, Brackets, Screws, and Anchors as One System
A shelf is only as strong as its weakest connection. The board, bracket, screw, wall anchor, and wall material must work together. Do not mix a heavy steel bracket with small decorative screws or use leftover anchors without knowing their rating. Use the fasteners recommended by the shelf manufacturer whenever possible, provided they match your wall type.
Bracket spacing should follow the product instructions. If instructions are unavailable, support the shelf near both ends and add intermediate brackets where the span or load requires them. Thin boards and engineered wood products can sag sooner than solid timber, so material strength is just as important as appearance.
Gather the Right Tools and Personal Protection
Preparing everything before you start reduces mistakes. A typical installation may require a tape measure, pencil, spirit level or laser level, stud finder, drill, correctly sized drill bits, screwdriver, masking tape, and a vacuum or dust sheet. You may also need a detector designed to identify live wires and pipes.
- Wear safety glasses while drilling, especially into masonry, plaster, or tile.
- Use hearing protection for prolonged drilling into concrete or brick.
- Use a stable step ladder rather than a chair or stacked objects.
- Keep loose clothing, hair, cables, and hands clear of the rotating drill bit.
- Remove children and pets from the immediate work area.
Check for Electrical Cables, Water Pipes, and Other Hidden Hazards
Check for hidden services before drilling. Wiring and plumbing can run vertically or horizontally through walls, especially near switches, sockets, taps, radiators, sinks, and bathrooms. Use a suitable detector according to its instructions, while remembering that no handheld device is perfect.
When a point is risky or the detector gives an uncertain reading, move the shelf or consult a qualified professional. Begin drilling carefully and stop if resistance changes unexpectedly, metal appears, or the hole feels different from the surrounding area.
Measure and Mark the Shelf Position Accurately
Choose the height according to reach, nearby furniture, doors, windows, and walking space. Avoid projecting shelves where people may hit them. In a child’s room, keep heavy objects out of reach and consider whether the shelf could be pulled or climbed on.
1. Mark the desired height at one end of the shelf.
2. Use a spirit or laser level to transfer the line across the wall.
3. Hold the brackets against the line and mark every fixing hole.
4. Measure the distance between brackets and compare it with the shelf length.
5. Check the complete layout again before drilling. A few extra minutes here can prevent several unwanted holes.
Locate Studs and Confirm Their Centers
On a framed wall, scan a wider area with the stud finder instead of trusting one signal. Mark both stud edges and identify the center. Repeat the scan at different heights because blocking, metal protectors, pipes, and wiring may confuse the detector. Confirm with a small hidden pilot hole where practical.
Where a bracket lands over a timber stud, use a suitable wood screw that passes through the wall finish and embeds securely. Do not place a standard drywall anchor in front of a stud because it may not expand correctly.
Use the Correct Anchor When a Stud Is Not Available
Plastic plugs, self-drilling anchors, hollow-wall anchors, and toggle bolts are not interchangeable. Each has a specific hole size, wall-thickness range, and load rating. Follow the packaging and use the stated drill size. An oversized hole may let the fixing spin or pull out, while a small hole can damage it.
For heavier loads, a correctly rated fixing that clamps behind the wall may provide more support than a basic plug. Capacity still depends on wall condition, anchor spacing, shelf depth, and load position. Do not trust damaged, damp, crumbling, or heavily patched drywall for a demanding shelf.
Step-by-Step Shelf Installation
1. Place masking tape over delicate paint, plaster, or tile where appropriate. The tape can reduce surface marking and helps keep a drill bit from wandering.
2. Drill pilot holes straight and to the required depth. Use a low speed when starting, and never force the drill.
3. Insert the correct plugs or anchors so they sit as the manufacturer directs. Replace any anchor that bends, cracks, spins, or does not seat properly.
4. Attach the first bracket loosely. Do not fully tighten it until the second bracket has been positioned and checked.
5. Fit the remaining brackets, place the level across them, and make small adjustments.
6. Tighten the fixings evenly. Over-tightening can crush drywall, strip screw holes, distort brackets, or crack tile.
7. Place the shelf board on the brackets and secure it from below if the design includes retaining screws.
8. Check level from the front and side, then confirm that the shelf does not rock, lift, or pull away from the wall.
Special Advice for Tile, Brick, Concrete, and Old Plaster
For tile, mark carefully, use the correct tile bit, and begin without hammer action. After passing through the tile, change the bit or technique for the wall behind it. Avoid tile edges, where cracking is more likely. Consider professional help for expensive or irreplaceable surfaces.
Brick and concrete need suitable masonry bits and approved fixings. Drill into sound material rather than weak mortar unless the system allows it. On old plaster, use light pressure to limit cracking and vibration. If the wall crumbles, stop and reassess instead of forcing a larger screw into damaged material.
Test the Shelf Before Adding the Full Load
Do not fill the shelf to its maximum load immediately. Apply gentle pressure near each bracket and watch for movement, cracking, or gaps. Add items gradually, placing heavier objects close to the supports and toward the back, where they create less leverage.
Never test a shelf by hanging from it or using your body weight. A controlled check is safer. If a screw spins, an anchor moves, or the wall deforms, unload the shelf and repair the fixing before use.
Common Installation Mistakes to Avoid
- Guessing the wall type and using the same plugs for every surface.
- Ignoring the weight of the shelf board when calculating the total load.
- Using too few brackets on a long shelf.
- Drilling near sockets or plumbing fixtures without checking for hidden services.
- Marking holes before checking level and bracket spacing.
- Using screws that are too short, too thin, or not compatible with the anchor.
- Over-tightening fixings until the wall material becomes crushed or cracked.
- Loading the shelf immediately without a gradual stability test.
Maintain and Inspect Wall-Mounted Shelves
Inspect the shelf every few months. Confirm that it remains level and that brackets are secure. Look for cracks, gaps, sagging, rust, moisture damage, or a load that has grown heavier than planned. Recheck it after nearby renovation, vibration, leaks, or accidental impact.
Do not repeatedly tighten a loose screw into a failing anchor. Remove the load, investigate the cause, and replace the fixing or move the bracket to sound material. For more practical guidance on home, technology, and improvement topics, readers can visit aelftech.com.
When Should You Hire a Professional?
Hire an experienced installer when the shelf is very heavy, unusually long, high above people, or intended for valuable equipment. Professional help is also sensible when wiring or plumbing is uncertain, the wall is damaged or old, the surface is stone or expensive tile, or secure fixing points cannot be identified.
A professional can assess the wall and choose suitable anchors. Electrical uncertainty should be handled by a qualified electrician, while suspected plumbing needs an appropriate tradesperson. Safety matters more than completing the task alone.
Frequently Asked Questions
Can wall-mounted shelves be installed without studs?
Yes, some shelves can be installed with correctly rated hollow-wall anchors or toggle fixings. The safe choice depends on the wall condition, shelf depth, and total load. Heavy shelves should be attached to studs or another structural support whenever possible.
How much weight can a floating shelf hold?
There is no universal number. Capacity depends on the shelf design, internal bracket, screw type, wall material, fixing spacing, installation quality, and load position. Use the manufacturer’s stated limit and remain below it.
Should shelf brackets point upward or downward?
Install brackets in the orientation shown by the manufacturer. Reversing a bracket may change how it transfers the load and can reduce stability, even when it appears to fit.
How do I stop a shelf from sagging?
Use a thicker or stronger board, reduce the distance between brackets, add a center support, and keep heavy objects close to the supports. A sagging shelf should be unloaded before it becomes permanently damaged.
Is it safe to drill directly above an electrical outlet?
It can be risky because wiring often runs vertically or horizontally from outlets and switches. Use a suitable detector, understand likely cable routes, and choose another fixing position when there is uncertainty.
Conclusion
To install wall-mounted shelves safely, start with the expected load and wall type, then choose compatible brackets, screws, and anchors. Check for hidden services, mark with a level, drill controlled pilot holes, and tighten without damaging the surface. Test the shelf gradually and keep heavier items close to the supports. Careful work protects the wall, your belongings, and everyone in the room.
Leave a Reply