
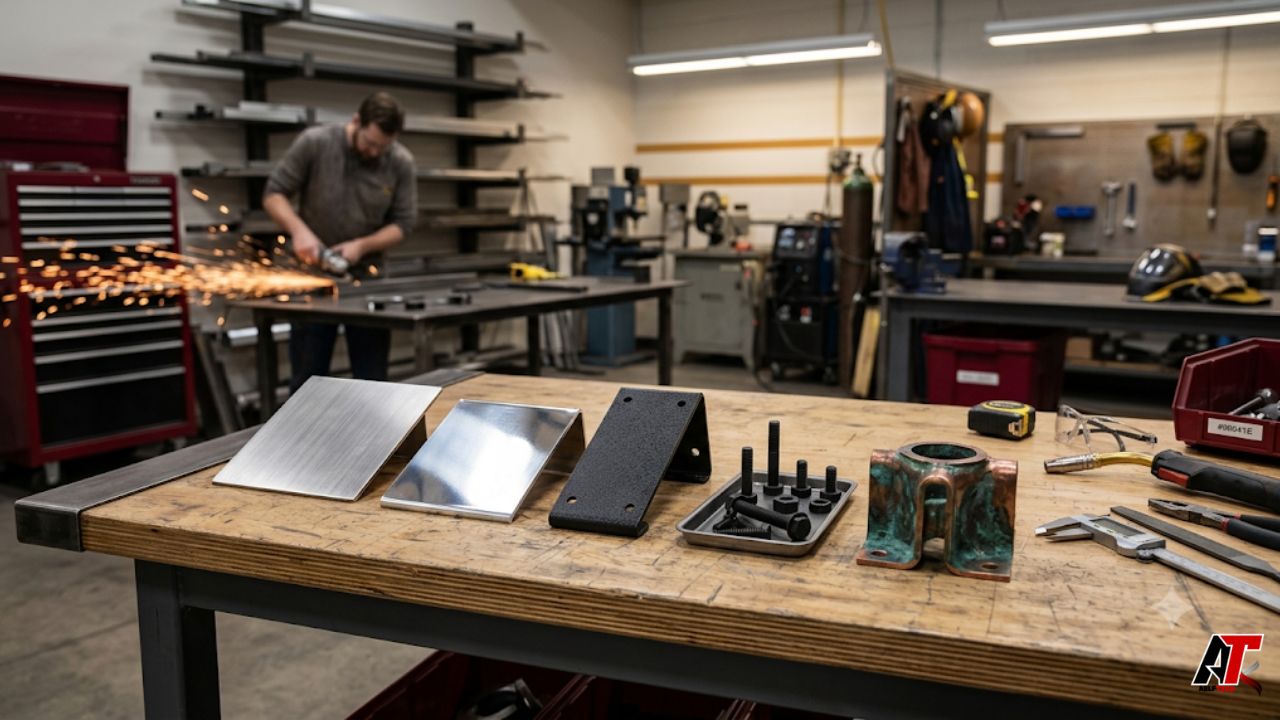
Metal finishing techniques can turn a simple build into a polished, durable, and professional project. Cutting, welding, and bending shape the metal. However, finishing gives the surface its final value. It improves appearance, protects against wear, and helps the project last longer.
A rough surface can make strong metal look cheap. On the other hand, a clean finish can make a basic part feel premium. Therefore, every maker, contractor, designer, and fabricator should understand the main finishing options before starting work.
This guide explains practical methods in a simple way. You will learn how to prepare metal, remove defects, add texture, apply coatings, and choose the right finish for different environments.
Why Metal Finishing Matters
A finish does much more than change color. It protects metal from moisture, fingerprints, chemicals, sunlight, and daily handling. In addition, it can improve safety by removing sharp edges and rough corners.
The right finish also supports the design goal. For example, polished aluminum looks bright and modern. Brushed stainless steel feels clean and refined. A dark patina creates a rustic or industrial mood. As a result, finishing helps the project look intentional.
Before you choose a method, think about use. Will the piece stay indoors or outdoors? Will people touch it often? Will it face rain, heat, abrasion, or chemicals? These answers will guide your decision.
Start with Proper Surface Preparation
Every good finish begins with surface preparation. If the metal has oil, rust, dust, scale, or deep scratches, the final finish will show those problems. Therefore, clean the surface before you polish, paint, coat, or seal it.
Start with a degreaser or a suitable cleaner. Then wipe the surface with a clean cloth. After that, inspect the metal under strong light. Look for burrs, weld marks, dents, and stains.
Preparation may include grinding, sanding, blasting, filing, or chemical cleaning. The goal is not always a shiny surface. Instead, the goal is a consistent base that accepts the next step correctly.
Grinding and Deburring
Grinding usually comes first after cutting or welding. It removes excess weld, sharp edges, spatter, and uneven areas. You can use an angle grinder, flap disc, rotary tool, or bench grinder, depending on the project size.
Deburring is just as important. Small burrs can cut hands, damage wires, catch fabric, or stop parts from fitting correctly. Therefore, remove them before the project moves forward.
However, do not grind too aggressively. Heavy pressure can remove too much material and create flat spots. Start with the least aggressive disc that works. Then move to finer abrasives for a smoother result.
Sanding for a Cleaner Surface
Sanding is one of the most useful metal finishing techniques. It helps remove scratches, smooth rough areas, and prepare metal for coating. You can sand by hand, with an orbital sander, or with a belt sander.
For the best result, move through grits step by step. For example, start with 120 grit for rough marks. Next, move to 220 grit. Then use 400 grit or higher for a finer surface.
Do not skip too many grits. If you jump from coarse to very fine paper, deep scratches can remain visible. Also, keep your sanding direction consistent on visible surfaces. This small habit makes the finish look cleaner.
Brushed and Satin Finishes
A brushed finish creates fine, straight lines on the metal. It works well on stainless steel, aluminum, signs, fixtures, furniture, and decorative panels. It also hides light fingerprints better than a mirror finish.
To create this look, use abrasive pads, sanding belts, wire brushes, or finishing wheels. Work in one direction. Also, keep steady pressure from start to finish. Uneven pressure can create waves or patchy lines.
A satin finish is softer and less reflective. It looks smooth without looking glossy. Therefore, it is a strong choice when you want a modern surface that still feels practical.
Polishing and Buffing
Polishing gives metal a bright, reflective surface. It works especially well on aluminum, brass, copper, and stainless steel. However, it needs patience because every scratch must become smaller before the surface can shine.
Start by sanding through fine grits. Then use a buffing wheel with the right compound. For example, a cutting compound can remove fine marks. After that, a finishing compound can bring out the final shine.
Keep the part moving while buffing. Heat can build quickly, especially on thin metal. Also, wear eye protection and secure small pieces safely. Polishing wheels can grab loose parts without warning.
Sandblasting and Bead Blasting
Blasting uses pressurized media to clean or texture metal. Sandblasting can remove rust, old paint, scale, and heavy surface contamination. Bead blasting creates a smoother matte finish with a more even appearance.
This method also helps coatings stick better. The blasted surface gives paint or powder coating a better grip. As a result, the finish can last longer when preparation and coating steps match correctly.
Safety matters during blasting. Dust, noise, and flying particles can cause harm. Therefore, use proper respiratory protection, gloves, eye protection, and a safe blasting area.
Painting and Protective Primers
Painting remains one of the easiest ways to finish metal. It offers color, protection, and flexibility at a reasonable cost. However, paint performs best when you use the right primer.
Primer helps paint bond to the surface. It can also add corrosion protection. For steel, aluminum, and galvanized metal, choose a primer made for that material. Otherwise, the paint may peel or chip early.
Apply several light coats instead of one heavy coat. Light coats dry more evenly and reduce drips. In addition, allow enough drying time between coats. A rushed paint job often fails before the metal itself does.
Powder Coating for Durable Color
Powder coating is a strong option for long-lasting color. In this process, dry powder is applied to metal with an electrostatic charge. Then the part cures with heat and forms a hard coating.
This finish resists chips, scratches, and corrosion better than many basic paints. Therefore, it is common on railings, frames, brackets, machinery guards, outdoor furniture, and consumer products.
Surface preparation still matters. Oil, dust, rust, or poor pretreatment can reduce adhesion. For that reason, professional powder coating usually includes cleaning, pretreatment, coating, and controlled curing.
Anodizing, Passivation, and Black Oxide
Some finishes change the metal surface instead of covering it. Anodizing works mainly on aluminum. It creates a protective oxide layer that can also hold color. As a result, the part gains both style and corrosion resistance.
Passivation works mainly on stainless steel. It removes surface contamination and helps the natural protective layer perform better. This process is useful for clean, technical, and corrosion-sensitive parts.
Black oxide creates a dark finish on steel or stainless steel. It looks sleek and adds mild protection. However, it often needs oil or wax to improve corrosion resistance.
Plating and Patina Effects
Plating adds a thin layer of another metal to the surface. Zinc, nickel, chrome, and copper plating are common choices. Each option offers a different mix of protection, appearance, and cost.
For example, zinc plating helps protect hardware from corrosion. Nickel plating offers a smooth decorative look. Chrome plating adds a bright finish, although it usually needs professional handling.
Patinas create aged, colored, or artistic surfaces. Copper and brass respond especially well to patina work. However, patinas can change over time. Therefore, seal the surface when you want the look to stay stable.
Clear Coats, Oils, and Waxes
Many metal projects need a final protective layer. Clear coats, oils, and waxes can help protect polished, brushed, or patinated surfaces. They also reduce fingerprints and slow oxidation.
Clear coats work well for decorative pieces and some outdoor items. Oils and waxes create a warmer handmade feel. However, they may need reapplication over time.
Always test the sealer first. Some clear coats can change the color, shine, or texture of the metal. A small test sample can prevent a costly mistake on the final piece.
Choosing the Right Finish
The best finish depends on the project. First, consider the environment. Outdoor pieces need strong corrosion protection. Indoor decorative pieces may focus more on texture, color, and visual style.
Next, consider use. A high-touch surface should clean easily. A machine part may need wear resistance. A display piece may need shine. Therefore, match the finish to the real job, not only to the look.
If you want inspiration, review a practical metal project before you start. Real builds can show how surface choices affect the final result. For exterior construction work, the same thinking applies to metal roofing in Utah. Weather, coatings, and long-term maintenance all matter.
Common Mistakes to Avoid
The biggest mistake is rushing preparation. Paint, powder coat, polish, and patina all depend on the base surface. If the base is poor, the finish will not hide it for long.
Another mistake is choosing a finish only because it looks good. For example, a delicate indoor coating may fail outside. Likewise, a mirror polish may look beautiful but show fingerprints quickly.
Also, avoid random sanding patterns. They can make the surface look cloudy or messy. Instead, use consistent strokes and move through grits carefully. Finally, clean the surface before every major step.
Maintenance Tips for Long-Lasting Results
A great finish still needs care. Clean the metal with products that match the surface. Avoid harsh abrasives on polished or coated pieces. Otherwise, you may scratch the finish while trying to protect it.
For brushed stainless steel, clean with the grain. For powder coating, mild soap and water usually work well. For waxed or oiled surfaces, reapply protection when the finish starts to look dry.
Check outdoor pieces often. Edges, joints, scratches, and fasteners usually fail first. If you fix small chips early, you can prevent larger corrosion problems later.
Final Thoughts
Metal finishing is not just the final step. It is part of the design, protection, safety, and value of the whole project. With the right method, metal can look better and perform longer.
Start with clean preparation. Then choose the finish that matches the environment, budget, and style. In addition, test samples when possible. A small test can save time, money, and frustration.
By using the right metal finishing techniques, you can take simple projects to a higher level. Whether you build furniture, signs, fixtures, brackets, panels, or custom parts, the finish will shape the final impression. For more helpful project content and professional publishing support, aelftech.com can help you present technical topics in a clear, reader-friendly way.
Leave a Reply