
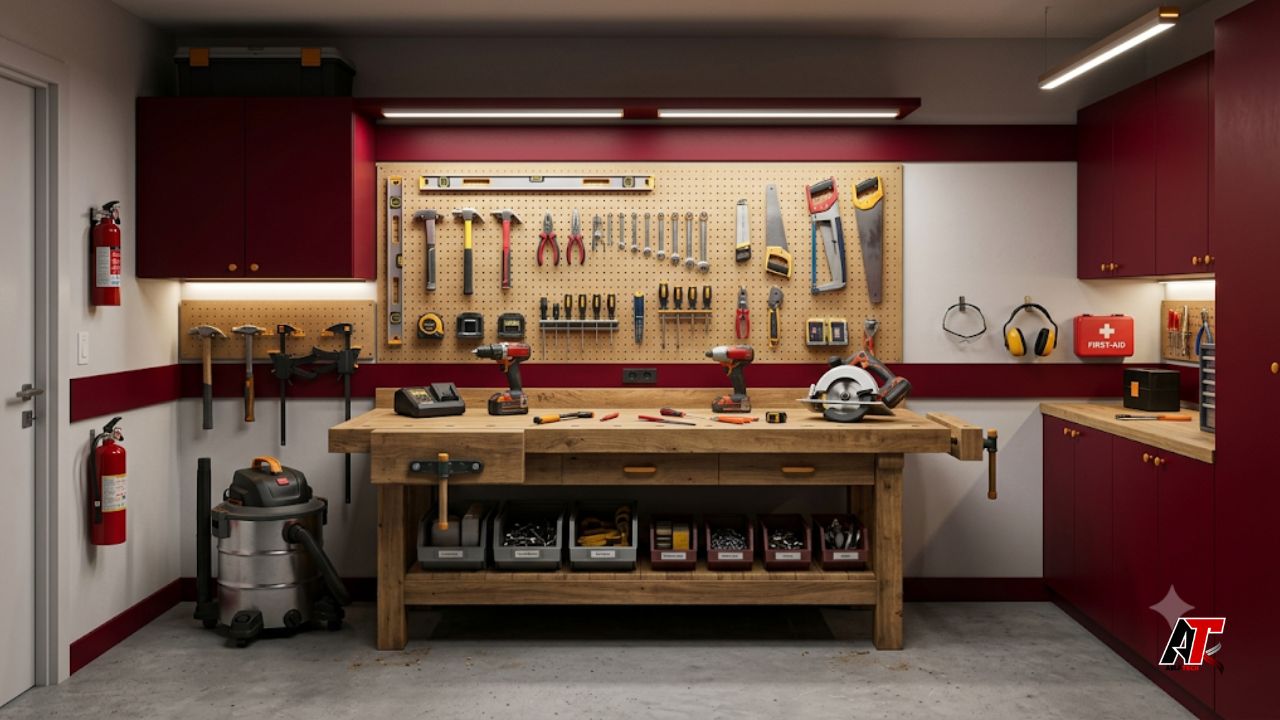
A well-planned garage workshop can turn weekend repair jobs, woodworking ideas, and home improvement projects into enjoyable, organized work. The goal is not to fill every shelf with expensive machines. A useful DIY garage workshop setup begins with a small group of reliable tools that help you measure, cut, assemble, repair, clean, and work safely. When each tool has a clear purpose, even a single-car garage can become a practical workspace.
The best setup also depends on the projects you expect to complete. A person building shelves needs different accessories from someone repairing bicycles or restoring furniture. However, the core tools remain similar. Start with versatile equipment, choose quality where it matters, and expand only when a new project creates a real need. The following ten essentials give you a strong foundation without making the workshop crowded or difficult to manage.
Plan the Space Before Buying Tools
Before buying tools, measure the available floor and wall space. Mark the location of the garage door, windows, power outlets, water heater, vehicles, and storage areas. Keep a clear walkway from the entrance to the main work zone. Large machines should not block doors or create tight corners where material becomes difficult to turn.
Divide the workshop into simple zones. One area can handle measuring and assembly, another can be used for cutting, and a separate wall can hold storage. Keep dusty work away from clean finishing tasks. It is also wise to think about the future. Most home workshops will never need industrial equipment, but larger renovation or commercial projects may require access solutions such as a spider lift or material-handling systems such as roller conveyors. Knowing the difference between everyday garage tools and specialized equipment helps you spend money wisely.
1. A Strong, Flat Workbench
The workbench is the center of a functional garage workshop. It supports measuring, clamping, sanding, drilling, assembly, and many repair jobs. Choose a bench that does not rock when pressure is applied. A solid wood top is easy to repair, while a steel frame offers extra strength. For general DIY use, a comfortable standing height is usually better than a low table, but the ideal height should match your body and the type of work you do.
Add a bench vise to hold wood, pipe, metal parts, or small objects securely. Bench dogs, clamps, and a replaceable top surface can make the station more useful. If floor space is limited, consider a folding wall-mounted bench or a mobile workbench with locking casters. Leave enough room around it to move long boards and open tool cases. A reliable workbench improves accuracy because the material stays stable instead of sliding across an unsuitable table.
2. A Complete Set of Basic Hand Tools
Power tools save time, but hand tools handle many daily tasks with better control. Your basic set should include claw and rubber mallets, flat-head and Phillips screwdrivers, adjustable and combination wrenches, pliers, locking pliers, a utility knife, a small pry bar, files, a hand saw, and a socket set. These tools help with repairs, furniture assembly, hardware installation, trimming, and jobs where a machine would be too aggressive.
Buy tools that feel comfortable in your hand. Handles should provide a secure grip, and metal parts should not bend under normal pressure. A tool chest with shallow drawers makes small tools easier to see than a deep box. Use drawer labels or foam organizers so missing items are noticed quickly. Hand tools last for many years when they are kept dry, wiped clean after use, and returned to the same location.
3. A Cordless Drill and Impact Driver
A cordless drill is one of the most useful tools in any DIY garage workshop setup. It drills holes, drives screws, mixes small batches of material with the correct attachment, and supports wire brushes, sanding drums, and hole saws. Choose a model with variable speed, a comfortable grip, and a battery system that can also power other tools from the same brand.
An impact driver is a helpful companion because it drives long screws and stubborn fasteners with less strain on your wrist. The drill can remain fitted with a drill bit while the impact driver holds a driver bit, which reduces constant bit changes. Keep a basic bit set that includes wood, metal, masonry, countersink, and common driver sizes. Store batteries away from extreme heat, charge them according to the manufacturer’s directions, and avoid forcing a dull bit through material.
4. A Circular Saw or Miter Saw
A circular saw is a strong first choice for cutting plywood, framing lumber, shelving, and many sheet materials. It is portable, affordable, and easy to store. When used with a straightedge guide, it can make long, clean cuts without requiring a large table saw. Select the correct blade for the material and support the workpiece on both sides of the cut.
A miter saw becomes valuable when your projects require repeated crosscuts, trim work, picture frames, deck boards, or accurate angles. It needs more permanent bench space, but it makes repeatable cuts quickly. Some beginners buy both machines at once, although one may be enough at the start. Always wait for the blade to stop before lifting or moving the saw. Keep hands outside the marked safety zone and never cut material that is not firmly supported.
5. Measuring, Marking, and Leveling Tools
Accurate work begins before the first cut. A 25-foot tape measure, combination square, speed square, steel ruler, marking pencil, chalk line, and spirit level cover most garage projects. A digital angle finder is useful for trim, ramps, furniture, and unusual corners. A stud finder can also save time during wall-mounted storage or home repairs.
Measure from the same reference edge whenever possible, and mark the waste side of every cut. Use a fine line rather than a wide pencil mark when precision matters. It is helpful to keep one tape measure at the workbench and another in a portable tool bag. Check squares and levels occasionally because drops can affect accuracy. Good measuring tools may not appear as exciting as power equipment, but they prevent wasted material, uneven shelves, poor-fitting joints, and repeated rework.
6. Clamps for Holding Work Securely
Clamps act like extra hands. They hold boards together during glue-ups, secure guides for saw cuts, keep material from moving while drilling, and support temporary repairs. A starter collection can include quick-grip clamps, F-style clamps, spring clamps, and at least two longer bar or pipe clamps. Different jaw sizes allow you to handle delicate parts and larger assemblies.
Do not tighten every clamp as hard as possible. Excess pressure can bow a panel, damage soft wood, squeeze out too much glue, or leave marks. Use scrap wood between the clamp and finished surface when needed. A wall rack keeps clamps visible and prevents them from becoming tangled in a corner. As your projects grow, add sizes based on actual requirements. Ten useful clamps are usually better than thirty random clamps that do not fit your work.
7. A Shop Vacuum and Dust-Control System
Dust and debris reduce visibility, damage finishes, create slipping hazards, and shorten the life of tools. A wet-and-dry shop vacuum can collect sawdust, metal shavings, small spills, and dirt that a household vacuum should not handle. Choose a model with enough hose length to reach the main work areas and use the correct filter for fine dust.
Connect the vacuum directly to sanders, saws, or routers when compatible. A cyclone separator placed before the vacuum can collect larger debris and reduce filter cleaning. Even with dust collection, wear suitable respiratory protection during dusty work and open the garage door when weather and safety allow. Sweep corners and clean horizontal surfaces regularly. A clean workshop is easier to use because tools are visible, measurements are clearer, and finished parts are less likely to be scratched by hidden debris.
8. Safe Lighting and Electrical Power
A single ceiling bulb is rarely enough for detailed work. Combine bright overhead lighting with adjustable task lights above the bench and cutting area. LED fixtures provide strong light with low heat and energy use. Place lights so your body does not cast a shadow directly over the workpiece. Portable magnetic or clamp lights are useful inside cabinets, under vehicles, and around machinery.
Power should be planned with equal care. Use grounded outlets, quality extension cords rated for the tool load, and power strips with overload protection where appropriate. Do not run high-demand tools through light household cords. Keep cords away from blades, hot surfaces, wet areas, and walkways. A retractable ceiling reel can reduce trip hazards. If the garage needs new circuits or additional outlets, use a qualified electrician rather than overloading the existing system.
9. Organized Tool and Material Storage
Good storage saves more time than many new tools. Use wall cabinets for chemicals and valuable equipment, open shelves for frequently used supplies, and pegboard or slatwall for tools that need to remain visible. Clear bins make small hardware easy to identify. Label containers for screws, anchors, electrical parts, sanding discs, blades, and finishing supplies.
Store long boards horizontally with enough support to prevent bending, or vertically in a secure rack that cannot tip. Keep heavy tools on lower shelves and light items above shoulder height. Flammable products, oily rags, batteries, and sharp objects require storage that follows their safety instructions. Leave some empty space for future purchases. A crowded workshop becomes difficult to clean, while an organized one lets you start a project without first moving five boxes and searching for missing hardware.
10. Personal Protective and Emergency Equipment
Safety equipment is an essential tool category, not an optional extra. Keep impact-rated safety glasses near the entrance so they are easy to wear before work begins. Add hearing protection, dust masks or a suitable respirator, work gloves for material handling, and a face shield for tasks that throw chips or sparks. Gloves should not be worn near rotating machinery when they could become caught.
Install a properly rated fire extinguisher in a visible and accessible location, and learn how to use it before an emergency. A stocked first-aid kit, eye-wash solution, smoke alarm, and bright emergency light are also valuable. Read the manual for every tool, inspect damaged cords and guards, and disconnect power before changing blades or clearing jams. Safe habits protect more than the person using the workshop; they also protect family members, pets, vehicles, and the home.
Build Your Workshop in Smart Stages
You do not need to purchase all ten categories in one weekend. Begin with the workbench, measuring tools, hand tools, drill, lighting, and safety equipment. Add cutting tools, clamps, storage, and dust control as projects become more demanding. Buying a dependable mid-range tool often provides better value than choosing the cheapest option and replacing it soon afterward.
Used tools can be a smart choice when guards, cords, batteries, adjustments, and moving parts are in good condition. Avoid used safety gear with an unknown history. Keep a simple inventory with model numbers, purchase dates, and replacement parts. For more practical technology, equipment, and workshop guidance, visit aelftech.com. A planned buying process keeps the garage useful and prevents tools from becoming expensive clutter.
Conclusion
A successful garage workshop is defined by function, not by the number of machines it contains. A strong bench, dependable hand tools, a drill and driver, a suitable saw, accurate measuring tools, useful clamps, dust control, proper lighting, organized storage, and complete safety equipment can support a wide range of home projects.
Build the space in stages and review the layout after every few projects. Move tools that are difficult to reach, improve lighting where shadows appear, and remove items that are rarely used. The best DIY garage workshop setup develops around your real working habits. When the workspace is safe, clean, and easy to navigate, you spend less time searching and more time building, repairing, and learning new skills.
Leave a Reply