
Self-tanning became a major beauty staple long before 2023, but the category continued to evolve with faster-developing formulas, clearer undertone choices, and more skin-friendly application methods. The appeal is simple: a well-applied sunless tan can add warmth and definition without deliberately exposing the skin to ultraviolet radiation. The difficult part is making the result look even, believable, and comfortable rather than streaky, orange, or patchy.
A reliable self-tan does not depend on one “miracle” bottle. It comes from a complete routine: preparing the skin, choosing the right formula, using the correct tools, blending carefully, allowing the colour to develop, and maintaining it properly. Whether you are tanning for a holiday, an event, a photo shoot, or simply because you enjoy a bronzed look, the following seven self-tanning essentials will help you create a smoother and more natural finish.
1. Prepare Your Skin Before Applying Any Tanner
The quality of a self-tan is largely decided before the tanning product touches your skin. Dry patches, leftover deodorant, body oils, and uneven texture can all cause the active tanning ingredient to grab more strongly in some areas than others.
Exfoliate approximately 24 hours before applying your tan. Use a gentle body scrub, exfoliating mitt, or mild chemical exfoliant suited to your skin. Concentrate on elbows, knees, ankles, heels, wrists, and any area where dead skin tends to build up. Avoid scrubbing so aggressively that your skin becomes red or irritated, because a compromised skin barrier can make the result less comfortable and predictable.
Hair removal also needs good timing. Shaving or waxing immediately before self-tanning can leave follicles open and create visible dark dots. Completing hair removal the day before gives the skin time to settle. On tanning day, shower with a simple cleanser, rinse thoroughly, and allow the skin to become completely dry and cool.
Apply a small amount of plain moisturiser only to naturally dry zones. The goal is to soften these areas, not to coat the whole body in a slippery layer. A light barrier on elbows, knees, knuckles, ankles, and heels helps prevent overdevelopment.
2. Choose the Right Formula, Depth, and Undertone
Self-tanners are available as mousses, lotions, gels, sprays, drops, waters, and gradual moisturisers. The best formula is the one that matches your experience level, skin type, available time, and desired depth of colour.
Mousse spreads quickly and often includes a guide colour that shows where the product has been applied. Lotion gives more working time and can feel comfortable on dry skin. Gradual tanners are useful for beginners because the colour builds slowly. Tanning drops can be mixed with facial or body moisturiser, allowing control over intensity. Clear tanning waters reduce guide-colour transfer, although missed areas are harder to see.
Undertone matters as much as depth. Olive or green-based formulas can help balance excessive orange tones, while violet or cool-toned bases may suit people seeking a deeper, less golden result. Warm golden formulas can flatter naturally warm complexions. Patch-testing is the best way to judge both the shade and your skin’s reaction.
Well-known ranges such as Bondi Sands can be useful for comparing formats, development times, and colour depths. Do not assume the darkest option will automatically look best; a realistic shade that complements your natural colouring usually appears more polished.
3. Build a Simple, Reliable Application Kit
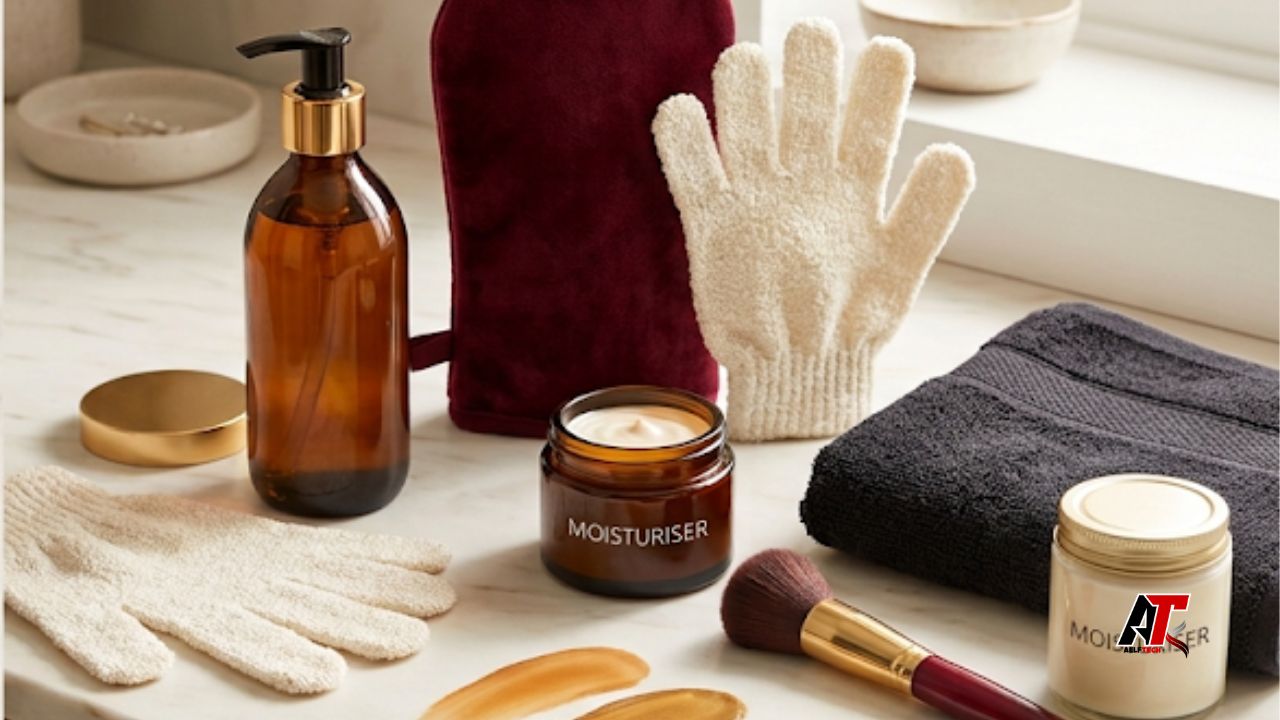
A tanning mitt is one of the most useful tools in a sunless-tanning routine. It protects the palms from staining and distributes mousse or lotion in a thin, even layer. Choose a mitt with a soft surface and an inner barrier that prevents liquid from soaking through.
Keep a few additional tools nearby: a large soft makeup brush for hands, feet, and the face; a small amount of moisturiser for blending; a hair tie or headband; a dark towel to protect the floor; and loose, dark clothing for the development period. A back applicator can be valuable when tanning alone.
Before starting, make sure the room is well lit. Natural light is ideal, but bright neutral lighting is a good alternative. Dispense product onto the mitt rather than directly onto the body, then fold or rub the mitt lightly to distribute it before application. This prevents one concentrated spot from developing much darker than the surrounding skin.
Clean tools after every use according to the manufacturer’s instructions. Old product trapped in a mitt can dry into uneven patches and make the next application harder to blend.
4. Apply in Sections and Blend Every Edge
Work in sections and use long, sweeping or circular movements rather than hurried rubbing. Begin with the legs, move to the torso and arms, and leave the driest, most detailed areas until the end. Applying from the lower body upward reduces the chance of creasing the stomach or hips while bending.
Use a moderate amount of product. Too little can create drag and streaks, while too much can pool around joints and take longer to dry. Blend each section slightly into the next so there are no sharp stopping lines. Check the sides of the torso, inner arms, backs of the legs, and the area near the underarms, because these are commonly missed.
When tanning the back, use a dedicated applicator or ask someone to help. Around the chest and neck, use what remains on the mitt rather than adding a full pump. The neck generally needs less product than the body because it is more visible and often naturally lighter.
After application, stand in front of a full-length mirror and inspect the colour guide from several angles. Gently buff visible lines with the clean side of the mitt. A careful two-minute check can prevent a noticeable mistake the next day.
5. Use Less Product on the Face, Hands, Feet, and Joints
Hands, feet, elbows, knees, and the face are the areas most likely to reveal that a tan is artificial. They have different textures, more movement, and more dry skin, so they should receive less product.
For hands, finish the arms first and use only the residue left on the mitt. Blend from the wrist toward the fingers, lightly covering the backs of the hands. Use a soft brush to diffuse product around knuckles and between fingers, then wipe the palms, nails, and cuticles with a damp cloth. Bend the fingers during blending so pale lines do not remain across the knuckles.
Treat feet in the same way. Blend lightly over the tops, around the ankles, and toward the toes. Avoid heavy product on heels and the sides of the feet. A small brush can soften the transition line at the ankle.
On elbows and knees, straighten and bend the joints during application to cover the folds without overloading them. For the face, use a formula suitable for facial skin or mix approved tanning drops with moisturiser exactly as directed. Blend into the hairline, around the ears, under the jaw, and down the neck. Avoid eyebrows and dry blemishes where colour can collect.
6. Respect the Drying and Development Time
Every self-tanner has a recommended development window. Some express products can be rinsed after one to three hours, while traditional formulas may need six to eight hours or overnight. Follow the product instructions rather than assuming that leaving it on longer will always create a better tan.
Allow the surface to become touch-dry before dressing. Wear loose, dark clothing and avoid tight waistbands, bras, socks, watches, or shoes that can rub the colour guide. During development, avoid exercise, rain, swimming, and any activity that causes heavy sweating. Even small splashes can create pale marks.
Your first rinse should usually be brief and lukewarm. Unless the instructions say otherwise, avoid scrubbing and strong body wash. Let the guide colour run off until the water is mostly clear, then pat the skin dry. The colour may continue to deepen after rinsing, so assess the final shade later rather than immediately.
Remember that guide colour is not always the finished tan. It is a temporary tint designed to assist application, so seeing brown colour in the shower does not necessarily mean the result has disappeared.
7. Maintain the Colour and Remove It Evenly
A self-tan fades as the outermost skin cells naturally shed. Daily habits determine whether it fades evenly or breaks into obvious patches. Moisturise once or twice a day with a simple, non-exfoliating formula. Hydrated skin generally holds colour more evenly, especially on shins, elbows, knees, and hands.
Keep showers moderate in temperature and length. Very hot water, vigorous towel drying, strong exfoliating acids, retinoids, chlorine, and repeated shaving can accelerate fading. You do not need to avoid normal hygiene or skincare; simply understand that highly exfoliating routines shorten the life of a sunless tan.
A gradual tanning moisturiser can refresh colour between full applications. Apply it sparingly and wash your hands afterwards. If one area fades faster, blend a small amount over the surrounding skin rather than placing a dark patch directly on the pale spot.
Before applying a completely new layer, remove the old tan as evenly as possible. Soak in warm water, apply a tan-removing product or gentle exfoliant, and use a mitt without excessive pressure. Stubborn patches may require two gentle sessions rather than one aggressive scrub. Reapplying over a broken, scaly base usually makes the texture more visible.
Important Safety Notes: UV Protection and Injectable Products
Sunless colour should never be confused with sun protection. Most self-tanners colour the surface of the skin but do not provide meaningful protection from ultraviolet radiation. Continue using broad-spectrum sunscreen, protective clothing, shade, and other sun-safe habits whenever you are outdoors.
It is also important to distinguish topical self-tanning products from products marketed online as tanning injections. Australian regulators have warned consumers about unapproved products containing melanotan because product quality, dosage, contamination, and side effects may be uncertain. A cosmetic tan is not worth taking an unregulated medical risk. Anyone considering an injectable, nasal, or peptide-based tanning product should first speak with a qualified healthcare professional and review current advice from the Therapeutic Goods Administration.
Patch-test any topical self-tanner before full-body use, especially if you have sensitive skin, eczema, allergies, or a history of reactions to cosmetics. Stop using the product if you develop significant irritation, swelling, blistering, breathing difficulty, or another concerning symptom, and seek appropriate medical advice.
Frequently Asked Questions
How long should I wait after shaving before self-tanning? Waiting about 24 hours is a practical rule for many people. It allows temporary irritation to settle and helps reduce the appearance of dark dots in open follicles.
Can I apply self-tanner over an old tan? You can refresh an evenly fading tan with a gradual product, but a full new coat should not be applied over heavy, patchy buildup. Gently remove uneven colour first so the new layer develops on a smoother base.
Does self-tanner protect the skin from the sun? No. A cosmetic tan does not replace sunscreen. Use broad-spectrum sun protection and follow local sun-safety guidance even when your skin looks bronzed.
Conclusion
The best self-tanning results come from consistency rather than speed. Prepare the skin a day in advance, select a formula suited to your skin and experience, work with clean tools, apply in controlled sections, use less product on detailed areas, respect the development time, and maintain the colour with gentle hydration. These seven self-tanning essentials make the process easier to repeat and reduce the most common causes of streaks and patchiness.
Beauty content should help readers make practical, informed choices. The team aelftech.com shares user-friendly digital content designed to turn complicated topics into clear guidance. With realistic expectations and a careful routine, a sunless tan can look smooth, balanced, and natural while remaining separate from the UV exposure associated with traditional tanning.
Leave a Reply