
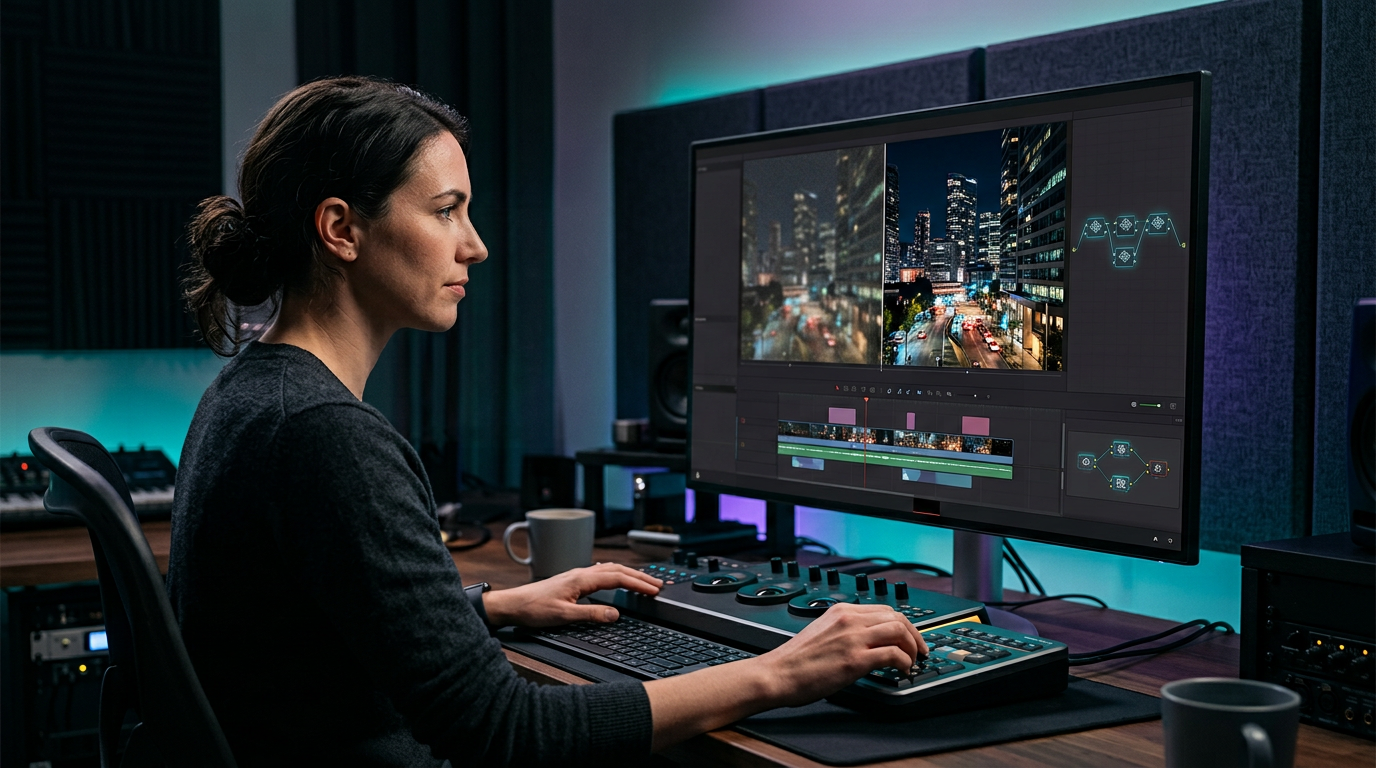
An AI video enhancer can improve low-resolution, noisy, dark or heavily compressed footage by analysing patterns across frames and reconstructing a cleaner-looking result. Modern enhancement tools can upscale resolution, reduce grain, clarify edges, balance colour and improve the appearance of older recordings. However, they cannot recover every detail that the camera failed to capture, and aggressive settings can create artificial textures, halos or unstable faces. This guide explains how AI video enhancement works, which problems it can address, how to build an efficient workflow and what to check before exporting a final video.
What Is an AI Video Enhancer?
An AI video enhancer is software that uses machine-learning models to improve perceived video quality. Instead of applying the same sharpening or denoising formula to every pixel, an AI model analyses visual context and predicts how a clearer frame might look.
Enhancement can include:
- Resolution upscaling
- Noise reduction
- Compression-artifact removal
- Sharpening
- Low-light correction
- Colour balancing
- Frame stabilisation
- Detail reconstruction
- Face refinement
- Deblurring
Some tools run locally on a desktop computer, while others process files through cloud servers. Video editors may integrate enhancement directly into the timeline, allowing the user to improve footage and continue editing in one project.
An AI video enhancer does not simply reveal a hidden high-resolution original. It estimates or reconstructs information based on patterns learned during model training. The output can look more detailed, but some of that detail may be synthetic. This distinction matters for archival, legal, medical, scientific and documentary footage.
How Does an AI Video Enhancer Work?
Traditional upscaling increases image dimensions through interpolation. It creates new pixels from neighbouring pixel values but does not understand objects, faces or textures.
AI-based enhancement uses trained neural networks to recognise visual structures. A model may learn how edges, hair, fabric, skin, text, buildings and landscapes typically appear. It uses those patterns to predict a higher-quality frame.
Video enhancement is more complex than improving one photo because adjacent frames must remain consistent. If the model treats every frame independently, reconstructed details may flicker or change shape. Better systems use temporal information to maintain continuity across motion.
An AI video enhancer may use separate models for different tasks:
- A general model for standard footage
- A generative model for stronger reconstruction
- A low-light model for dark scenes
- A face-focused model
- A model optimised for animation
- A denoising or deblocking model
The strongest setting is not always the best. Model choice should match the source problem.
9 Best Ways to Use an AI Video Enhancer
A disciplined workflow produces more natural results than applying every enhancement at maximum strength. The following methods address common footage problems.
1. Upscale Low-Resolution Footage
Upscaling increases pixel dimensions so older or small footage can be used in a higher-resolution project. Common examples include standard-definition family videos, early digital clips, screen recordings and archive material.
An AI video enhancer can create cleaner edges and more plausible textures than basic interpolation. It may help a small clip look better on a modern display, but output resolution should remain realistic.
Converting a very small source to 4K does not make it equivalent to native 4K footage. The software can improve presentation, but it cannot recreate exact facial features, signs or distant objects that were never recorded clearly.
Test a short section before processing the full video. Review faces, hair, foliage, text and fine patterns at normal playback speed and at 100% zoom. If details look waxy or invented, use a milder model or lower output resolution.
2. Reduce Digital Noise and Grain
Low-light video, high ISO settings and older sensors can produce luminance and colour noise. Compression may make the problem worse.
Denoising models attempt to separate random noise from meaningful texture. An AI video enhancer can make shadows cleaner and improve colour stability, but excessive denoising may remove skin texture, fabric detail and fine edges.
Noise should be assessed in motion, not only on a paused frame. A frame that looks smooth when stopped may appear smeared during playback. Temporal denoising can also create trails behind moving objects when pushed too far.
Retain some natural texture when appropriate. Film grain and sensor noise are not the same, and removing intentional grain from cinema footage can alter its character. A subtle re-grain after processing may help restored footage look cohesive.
3. Improve Dark and Low-Light Video
Dark footage often contains both underexposure and noise. Raising brightness without denoising can reveal coloured speckles and compression blocks.
A low-light AI video enhancer may lift shadows, correct colour casts and reduce grain simultaneously. It can improve visibility in night streets, indoor events and dimly lit mobile footage.
Clipped black areas contain little or no recorded detail. The model may create plausible texture, but it cannot confirm what was actually present. Likewise, blown highlights cannot always be recovered.
Avoid making night footage look like midday unless that is a deliberate creative choice. Preserve believable contrast and practical light sources. Check skin tones, black clothing and shadow edges for unnatural colour shifts.
For future recording, better lighting and correct exposure usually produce more reliable results than post-production rescue.
4. Remove Compression Artifacts
Online downloads, messaging apps and repeated exports can introduce blocking, mosquito noise, banding and edge ringing. These artifacts are especially visible around text, faces and high-contrast boundaries.
An AI video enhancer can identify compression patterns and smooth them while rebuilding edges. Results depend on how much information remains in the source.
Start with the highest-quality original available. Enhancing a re-downloaded social-media copy is less effective than processing the camera master. Ask collaborators for original files before beginning restoration.
Do not repeatedly enhance and export the same clip. Every lossy encode can introduce new artifacts. Keep an enhanced master in a high-quality intermediate codec, then create delivery copies from that master.
5. Clarify Soft or Slightly Blurry Video
Footage can appear soft because of missed focus, motion blur, lens limitations, camera shake or low resolution. Each cause behaves differently.
An AI video enhancer may improve edge definition and local contrast, making mild softness less distracting. It cannot fully restore a face that is severely out of focus or remove long motion streaks without making assumptions.
Sharpening artifacts include bright halos, dark outlines, exaggerated pores and crawling edges. These are easier to notice around text, glasses, hair and architecture.
Apply enhancement after stabilisation if camera movement interferes with analysis, but test both orders because software differs. For motion blur, a model designed for deblurring may perform better than a general upscaler.
6. Restore Older Family and Archival Video
Home movies, videotapes and early digital recordings often combine low resolution, noise, colour fading, interlacing, dropouts and unstable exposure.
A careful workflow may include:
- High-quality capture from the original medium
- Time-base correction or signal repair where relevant
- Deinterlacing
- Cropping and stabilisation
- Noise and artifact reduction
- AI upscaling
- Colour correction
- Final quality review
An AI video enhancer should not replace proper digitisation. If the analogue capture is poor, the model may enhance capture defects rather than the original image.
Preserve an untouched archival master before restoration. The enhanced version is an interpretation, especially when generative reconstruction is used. Do not overwrite the source or imply that invented details are historically exact.
7. Improve Faces and Skin Detail Carefully
People are highly sensitive to facial changes. Minor inconsistencies in eyes, teeth, skin or hair can make enhanced footage look uncanny.
Face-focused models can improve clarity in interviews, family recordings and social content. They can also alter identity, age cues, makeup, skin texture and expression if used too strongly.
Review multiple frames and watch the full sequence. A face may look convincing in one frame but flicker between expressions during motion. Check profile views, partial occlusion, glasses and fast head turns.
An AI video enhancer should not be used to misrepresent a person or create evidence of an expression that did not occur. Obtain appropriate consent when processing identifiable people, particularly for commercial or sensitive footage.
8. Prepare Video for Social Media and Marketing
Brands and creators often repurpose older assets for vertical video, product pages and advertising. Enhancement can help low-quality clips blend with newer footage.
Begin by defining the delivery platform, aspect ratio, resolution and bitrate. There is little value in processing a huge master if the platform will display a small, highly compressed clip—although retaining a high-quality archive master is still useful.
Use an AI video enhancer before adding text and graphics when possible. Upscaling after adding titles can alter edges and reduce graphic clarity. Add captions and logos at the final project resolution.
Product comparison, beauty, real estate and documentary content should be treated carefully. Enhancement must not create misleading product texture, conceal defects or change factual visual evidence. Clearly disclose materially altered content when context requires it.
9. Build a Repeatable Quality-Control Workflow
AI output needs human review. Automation speeds up processing, but the software does not understand every creative, legal or factual requirement.
Create a quality-control checklist:
- Compare source and output side by side.
- Review at normal speed.
- Inspect difficult frames at full resolution.
- Check faces, hands, text and patterns.
- Look for flicker and temporal instability.
- Confirm audio sync.
- Verify colour and skin tones.
- Check frame rate and duration.
- Review transitions and cuts.
- Confirm export settings.
An AI video enhancer may process different shots unevenly. Split a project into groups based on source type and apply appropriate settings rather than using one model across everything.
AI Video Enhancer Features to Compare
Software quality cannot be judged by a single “upscale to 4K” claim. Compare the complete workflow.
Model selection
Look for task-specific options such as general enhancement, generative reconstruction, low-light processing, face restoration and animation support.
Temporal consistency
A good video model should limit flicker and maintain details across frames. Photo-enhancement models applied frame by frame can produce unstable results.
Resolution choices
Useful software allows proportional enlargement and common output sizes rather than forcing one large target.
Preview and comparison
Side-by-side, split-screen and short preview renders save time. Full processing can be computationally expensive.
Hardware acceleration
GPU and specialised hardware support can reduce render time. Check minimum memory, graphics compatibility and operating-system requirements.
Local vs. cloud processing
Local processing can offer more privacy and control, while cloud processing reduces hardware requirements. Review upload, storage, retention and deletion policies before sending confidential footage.
Editing integration
An integrated AI video enhancer allows trimming, colour, audio, titles and export in one application. Standalone tools may offer deeper model control but add intermediate files.
Export formats
Check codec, bit depth, frame rate, colour space, alpha support, audio handling and professional intermediate formats.
Pricing and usage limits
Some tools require a subscription, AI credits or additional model downloads. Confirm watermarks, export limits, cloud charges and commercial-use terms.
AI Video Enhancer Workflow From Import to Export
A practical sequence can reduce rework.
Step 1: Secure the best source
Locate the original camera file, tape capture or highest-bitrate copy. Avoid a file downloaded repeatedly from messaging platforms.
Step 2: Inspect technical properties
Record resolution, frame rate, scan type, codec, bit depth, colour space and audio format. Variable-frame-rate mobile clips may need special handling.
Step 3: Preserve the original
Create a read-only backup and work from a duplicate. Use descriptive filenames and maintain source metadata.
Step 4: Correct structural issues
Deinterlace, repair aspect ratio, remove duplicate frames or stabilise when these problems would interfere with enhancement.
Step 5: Select the model
Choose the AI video enhancer mode based on the dominant issue. Do not apply a low-light model to well-exposed footage solely because it appears more dramatic.
Step 6: Render a test
Process five to twenty seconds containing faces, movement, texture and shadows. Test more than one setting.
Step 7: Review objectively
Compare at the intended display size and full resolution. Ask whether the result looks more natural, not merely sharper.
Step 8: Process the master
Export to a high-quality intermediate format if further editing is planned. Preserve frame rate unless deliberate conversion is needed.
Step 9: Complete creative finishing
Perform colour grading, audio work, titles and final edits. Avoid unnecessary additional sharpening.
Step 10: Create delivery files
Encode versions for web, social, broadcast or archive from the enhanced master.
AI Video Enhancer for 4K Upscaling
4K upscaling is one of the most marketed features, but output dimensions do not equal native detail.
A clean 1080p source can often upscale convincingly to 4K, particularly for moderate viewing distances. Standard-definition material presents a much larger information gap. The result may look smoother and more polished without containing true 4K detail.
Consider a two-times enlargement before a four-times enlargement. Extreme scaling increases the opportunity for synthetic texture and edge artifacts.
An AI video enhancer should preserve the original aspect ratio. Stretching 4:3 footage to fill 16:9 distorts faces and objects. Use pillarboxing or a deliberate crop instead.
Do not confuse resolution with bitrate. A 4K file encoded at an insufficient bitrate can look worse than a well-encoded lower-resolution file.
AI Video Enhancer for Low-Light Footage
Low-light enhancement must balance brightness, colour and noise. Lifting shadows can expose sensor banding and fixed-pattern noise.
Evaluate:
- Shadow detail
- Black level
- Skin-tone accuracy
- Highlight clipping
- Colour casts
- Noise movement
- Edge stability
- Light-source realism
An AI video enhancer with a dedicated night model may produce better results than a generic tool. Still, colour correction after enhancement may be needed.
Avoid crushing blacks to hide noise, as this can remove legitimate detail. Avoid excessive saturation, which magnifies chroma noise and creates unnatural skin.
For security or evidentiary video, preserve the original and document every processing step. Enhancement can aid viewing but should not be represented as exact recovery of missing information.
AI Video Enhancer for Old and Damaged Footage
Physical media can contain defects that AI does not address fully. Tape mistracking, frame tears, film scratches, flicker and colour-channel misalignment may need specialised restoration before enhancement.
The best order depends on the defect:
Deinterlace before upscale
Interlaced combing becomes harder to remove after enlargement.
Stabilise severe weave before detail enhancement
Excessive frame movement can confuse temporal models.
Correct dropouts before generative enhancement
The model may turn signal damage into false texture.
Perform moderate colour correction after denoising
Noise reduction can change perceived saturation and contrast.
An AI video enhancer can be one stage of restoration, not the entire process. Keep a log of settings so the work can be reproduced.
Ethical and Legal Considerations
Enhancement changes visual information. Most creative uses are harmless, but some contexts require disclosure and strict preservation.
Documentary and journalism
Do not alter factual meaning. Reconstructed detail should not be presented as original evidence when it could change interpretation.
Legal and security footage
Preserve the source, work on copies, document settings and maintain chain of custody. Consult qualified forensic professionals.
Medical and scientific imaging
Consumer enhancement tools are not validated diagnostic systems. Do not use generated detail for clinical or scientific decisions.
Faces and personal data
Obtain rights and consent appropriate to the project. Cloud processing may involve biometric or personal information.
Copyright
Possessing a video file does not necessarily grant the right to modify or publish it. Confirm ownership and licensing.
An AI video enhancer should be used as a production tool, not as a way to fabricate evidence or mislead viewers.
Common AI Video Enhancement Mistakes
Choosing the strongest model by default
Generative models can invent texture. Use the least aggressive setting that solves the problem.
Upscaling before deinterlacing
This enlarges combing artifacts and can confuse the model.
Ignoring temporal flicker
A good paused frame can hide unstable motion. Always watch the sequence.
Re-encoding repeatedly
Multiple lossy exports accumulate compression artifacts. Keep a high-quality master.
Over-sharpening faces
Exaggerated pores, eyes and hair can look artificial and change identity.
Processing titles with the footage
Add clean graphics after enhancement whenever possible.
Sending confidential video to the cloud without review
Understand provider retention, training and deletion terms first.
Assuming 4K output means 4K detail
Resolution dimensions can increase even when source information remains limited.
Hardware Requirements and Processing Time
AI enhancement can be computationally demanding. Processing time depends on resolution, model, frame count, GPU, memory and output codec.
Before buying software, check:
- Supported operating system
- GPU model and video memory
- System RAM
- Storage capacity
- Free space for cache
- Hardware-encoding support
- Cloud-credit requirements
- Model download size
A short 4K project can require substantial temporary storage. Fast solid-state storage improves workflow but does not replace a capable GPU.
Laptop users should monitor heat and power. Long renders may throttle performance. Keep the device ventilated and connected to an appropriate power source.
If hardware is limited, cloud processing may be practical, but privacy and recurring cost must be considered.
How to Evaluate AI Video Enhancer Results
Use both technical and perceptual criteria.
Technical review
- Correct resolution
- Correct frame rate
- Preserved duration
- Audio sync
- No dropped or duplicate frames
- Valid colour space
- Adequate bitrate
- No clipping introduced
Visual review
- Natural faces
- Stable details
- Controlled noise
- No edge halos
- No plastic textures
- Accurate colours
- Believable shadows
- Readable original text without invented characters
Delivery review
Watch the file on the intended device or platform. Social-media recompression can change sharpness and colour, while a television may reveal artifacts not visible on a laptop.
An AI video enhancer result should be accepted because it improves the intended viewing experience, not because one metric or model label sounds impressive.
AI Video Enhancer Pricing and Value
Pricing models include one-time licences, subscriptions, AI credits, cloud minutes and paid upgrades. The cheapest option may become expensive if every render consumes credits.
Evaluate:
- Export watermark
- Maximum resolution
- Available models
- Local-processing limits
- Cloud credits
- Commercial rights
- Updates
- Device count
- Customer support
- Refund policy
Estimate cost per finished minute using typical project settings. Render time is also a cost, especially for professional teams.
A full editor with an integrated AI video enhancer can provide better value for creators who also need trimming, titles, colour and audio. A specialist standalone application may suit restoration professionals who prioritise model control.
Questions to Ask Before Choosing an AI Video Enhancer
- Which source problems does each model address?
- Does the software analyse multiple frames?
- Can I preview short sections?
- Is processing local or cloud-based?
- Are uploaded files retained or used for training?
- Which GPUs are supported?
- Are AI credits required?
- Can I export professional codecs?
- Does it preserve frame rate and audio sync?
- Are commercial-use rights included?
- What happens when a model is updated?
- Can I cancel and retain completed exports?
Transparent answers make it easier to compare workflow cost and privacy.
Conclusion
An AI video enhancer can make low-resolution, noisy, dark and compressed footage more useful for modern projects. Its strongest applications include moderate upscaling, denoising, low-light correction, deblocking and restoration support.
The best results come from preserving the original, choosing a model for the actual defect, rendering short tests and reviewing motion as carefully as individual frames. Aggressive settings can create false texture, unstable faces and artificial edges, so natural improvement should take priority over maximum sharpness.
Use an AI video enhancer within a controlled workflow that protects privacy, copyright and factual integrity. Keep high-quality masters, document restoration choices and disclose material alteration when context requires it. AI can improve presentation, but thoughtful human review remains essential for reliable, believable video.
FAQs
1. What does an AI video enhancer do?
It uses machine-learning models to upscale resolution, reduce noise, remove compression artifacts, sharpen detail and improve low-light footage.
2. Can an AI video enhancer convert any video to true 4K?
It can create a 4K-sized output, but it cannot recover every detail missing from a low-resolution source. Some reconstructed details are synthetic.
3. Is AI video enhancement good for old home movies?
Yes, especially after high-quality digitisation and deinterlacing. Preserve the untouched source because restoration can alter or reconstruct details.
4. Why does enhanced video sometimes look unnatural?
Excessive denoising, sharpening or generative reconstruction can create plastic skin, halos, flicker and invented textures. Use milder settings.
5. Does AI video enhancement require a powerful computer?
Local processing often benefits from a modern GPU, ample memory and fast storage. Cloud tools reduce hardware needs but may add cost and privacy concerns.
6. Is it safe to upload private footage to an online enhancer?
Review the provider’s privacy, retention, deletion and model-training policies first. Sensitive footage may be better processed locally.
Leave a Reply